gold-bearing rock identification pdf

Gold-bearing rock identification is crucial for mining and exploration, focusing on economic deposits in quartz veins, skarns, and polymetallic systems․ This field combines geology, mineralogy, and geochemistry to locate gold in hydrothermally altered rocks, guiding prospecting efforts and enhancing mineral discovery efficiency․ Understanding these rocks’ characteristics, such as quartz associations and sulfide minerals, aids in identifying potential gold reserves, making it vital for sustainable resource development․

Overview of Gold-Bearing Rocks and Their Economic Importance

Gold-bearing rocks are geological formations containing gold in economic concentrations, often associated with quartz veins, skarns, and polymetallic deposits․ These rocks are vital for mining industries, as they provide significant gold reserves essential for global markets․ The economic importance lies in their potential to generate revenue through gold extraction, supporting national economies and sustaining industrial demands․ Gold-bearing rocks, such as quartz veins and hydrothermally altered zones, are highly sought after due to their mineral-rich compositions․ Regions like the Carlin Trend and Witwatersrand Basin exemplify the economic significance of these deposits, contributing substantially to global gold production and shaping the mining sector’s growth and development․

Geological Classification of Gold-Bearing Rocks

Gold-bearing rocks are classified into quartz veins, skarns, and polymetallic systems, each with distinct mineral associations and geological origins, aiding in understanding their formation and economic potential․

Types of Gold Deposits: Quartz Veins, Skarns, and Polymetallic Veins

Gold deposits are primarily categorized into three types: quartz veins, skarns, and polymetallic veins․ Quartz veins are the most common, often containing gold within quartz minerals, typically in hard rock formations․ Skarns form through metamorphic processes, where gold is associated with calcium-silicate minerals like garnet and pyroxene․ Polymetallic veins are complex, hosting multiple metals alongside gold, including base metal sulfides․ These classifications help in understanding the geological settings and mineral associations, which are crucial for efficient exploration and extraction methods, making them vital for economic mineral resource development․

Classification Scheme for Gold-Bearing Skarns and Veins

A classification scheme for gold-bearing skarns and veins focuses on their mineral composition and geological context․ Skarns are classified based on their host rocks, such as calcic or magnesian types, and their association with gold and other minerals like garnet and pyroxene․ Veins are categorized by their metal content, distinguishing between gold-only and polymetallic systems․ This scheme helps in understanding the genetic relationships between gold and other minerals, such as sulfides and quartz, which are critical for exploration․ The classification also considers hydrothermal alteration zones, which are key indicators of gold mineralization․ By organizing these deposits into distinct types, geologists can better predict their distribution and economic potential, aiding in targeted mining operations and resource development․

Key Characteristics of Gold-Bearing Rocks

Gold-bearing rocks often contain quartz, sulfide minerals, and exhibit hydrothermal alteration․ They may display distinct color and textural changes, aiding in identification and exploration efforts․

Association with Quartz and Sulfide Minerals

Gold-bearing rocks are often closely associated with quartz and sulfide minerals, which serve as key indicators for prospectors․ Quartz frequently forms the gangue mineral in gold-bearing veins, where it provides a stable host for gold deposition․ Sulfide minerals, such as pyrite, arsenopyrite, and stibnite, are also commonly linked to gold mineralization․ These minerals often form in hydrothermal environments, where gold is concentrated․ While the presence of sulfides doesn’t always guarantee gold, their occurrence can signal the right geological conditions for its formation․ Recognizing these mineral associations is critical for identifying potential gold-bearing rocks, even in the absence of visible gold, making them invaluable for exploration efforts․

Hydrothermal Alteration Zones and Their Indicators

Hydrothermal alteration zones are critical in identifying gold-bearing rocks, as they indicate regions where mineral-rich fluids have interacted with the host rock․ These zones are characterized by specific mineral assemblages and textural changes, such as sericitic, argillic, and propylitic alteration․ Sericitic alteration, marked by the presence of sericite and quartz, often occurs in areas with high gold potential․ Argillic alteration involves the formation of clay minerals, signaling intense hydrothermal activity․ Propylitic alteration, with its chlorite and epidote, typically forms in the outermost regions of hydrothermal systems․ These zones also contain sulfide minerals like pyrite and arsenopyrite, which are commonly associated with gold․ Recognizing these alteration patterns is essential for pinpointing gold mineralization and guiding exploration efforts effectively․

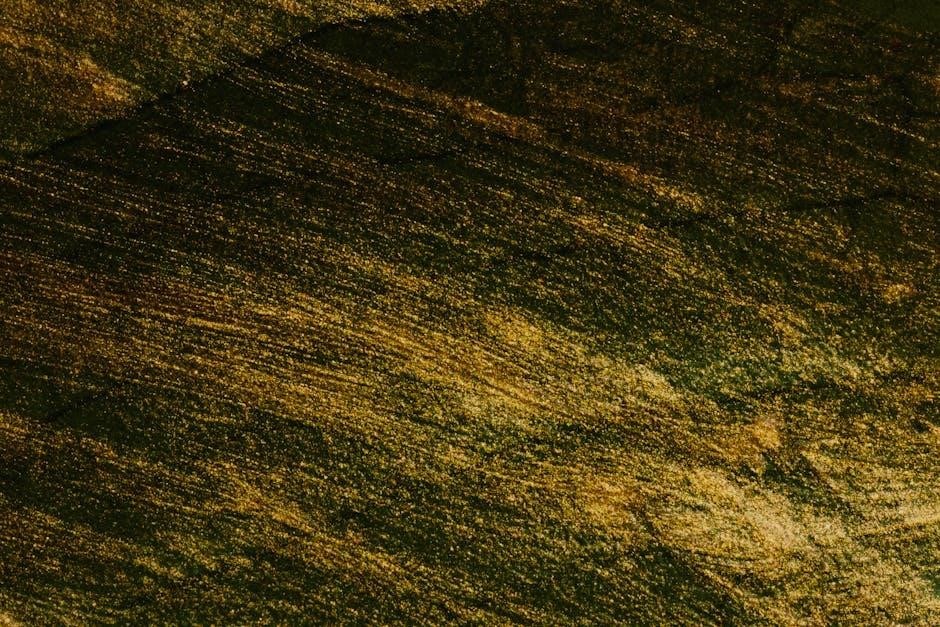
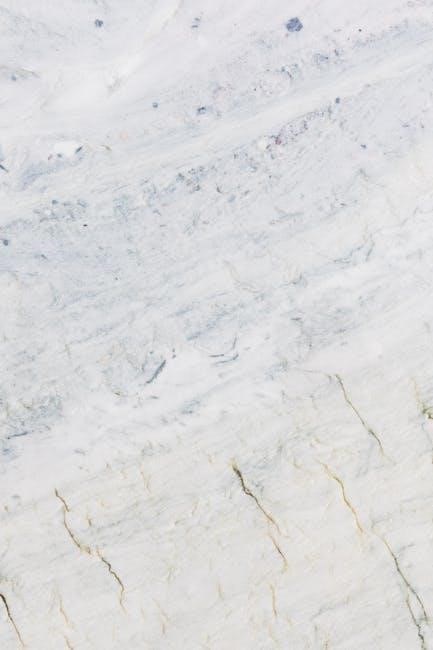
Color and Textural Changes in Gold-Bearing Rocks

Gold-bearing rocks often exhibit distinct color and textural changes due to hydrothermal alteration․ Iron oxide staining, visible as reddish or yellowish discoloration, is a common indicator of gold mineralization․ Sulfide minerals like pyrite and arsenopyrite, often shiny and brassy in appearance, are also associated with gold-bearing zones․ Texturally, these rocks may display quartz veining, stockwork patterns, or sericitic alteration, which can create a “sugary” or “micaceous” appearance․ Additionally, hydrothermal activity can cause bleaching or discoloration of the host rock, making gold-bearing areas stand out․ Recognizing these visual and textural features is a key skill for prospectors and geologists, aiding in the identification of potential gold deposits in the field․

Common Rock Types Associated with Gold

Gold is often found in quartz, schist, and volcaniclastic rocks, which serve as primary hosts for gold deposits․ Quartz is a major component, frequently containing gold in veins or as disseminated grains․ Schist and volcaniclastic rocks can also host gold in metamorphic or volcanic settings, making them key targets for exploration and mining efforts․

Quartz, Schist, and Volcaniclastic Rocks

Quartz is the most significant host rock for gold, often forming veins that contain gold in association with sulfide minerals․ Schist, particularly in metamorphic terranes, can also host gold, as seen in regions like the Ilesha schist belt․ Volcaniclastic rocks, derived from volcanic activity, may contain gold in both disseminated and vein-like structures․ These rock types are critical in understanding gold mineralization, as they often indicate hydrothermal activity or tectonic processes that concentrate gold․ Identifying these rocks in the field is essential for effective prospecting and exploration, guiding miners to potential gold reserves hidden within these geological formations․

Dacite Porphyry and Granitic Rocks

Dacite porphyry and granitic rocks are significant hosts for gold mineralization, particularly in hydrothermal systems․ These rocks often exhibit quartz veins and sulfide mineralization, which are key indicators of gold presence․ Dacite porphyry, a fine-grained volcanic rock, is commonly associated with copper and gold deposits, while granitic rocks, such as quartz monzonites, provide fertile ground for gold-bearing quartz veins․

The association of these rocks with hydrothermal alteration zones, such as sericitic and argillic alterations, enhances their potential for gold mineralization․ Their mineralogical and textural characteristics make them prime targets for exploration, as they often indicate the presence of economic gold deposits in various geological settings․

Role of Hydrothermal Alteration in Gold Mineralization

Hydrothermal alteration plays a pivotal role in concentrating gold within specific rock types, such as quartz veins and skarns, through mineralizing fluids and chemical reactions․

Sericitic, Argillic, and Propylitic Alteration

Sericitic, argillic, and propylitic alterations are key hydrothermal processes that significantly influence gold mineralization․ Sericitic alteration, characterized by sericite and quartz, is common in gold-bearing quartz veins and adjacent rocks, often indicating high-grade deposits․ Argillic alteration involves the formation of clay minerals like kaolinite and montmorillonite, typically in volcanic or sedimentary host rocks, and is associated with epithermal gold systems․ Propylitic alteration, marked by chlorite and epidote, occurs in deeper, more mesothermal environments, often linked to porphyry copper-gold deposits․ These alteration zones serve as critical indicators for prospecting, as they reflect the chemical and thermal conditions necessary for gold concentration, aiding in the identification of economically viable mineralized areas․

Case Studies and Examples of Gold-Bearing Rock Identification

The Carlin Trend and Witwatersrand Basin exemplify gold-bearing rock systems, showcasing sedimentary and conglomeratic gold deposits․ These case studies highlight how geological features and mineral associations guide exploration efforts effectively․

The Carlin Trend and Witwatersrand Basin Examples

The Carlin Trend, located in Nevada, is renowned for its gold deposits hosted in carbonate rocks, often associated with hydrothermal alteration zones․ The Witwatersrand Basin in South Africa is another significant example, known for its vast conglomeratic gold deposits, formed through ancient fluvial systems․ Both regions demonstrate the importance of geological structures and mineral associations in gold exploration․ Hydrothermal alteration, such as sericitic and argillic changes, plays a key role in the Carlin Trend, while the Witwatersrand’s gold is often found in quartz pebble conglomerates․ These case studies provide valuable insights into the diversity of gold-bearing rock systems and their economic significance, aiding future exploration strategies globally․

The study of gold-bearing rocks remains pivotal for advancing mineral exploration․ By understanding hydrothermal alteration zones, quartz vein systems, and skarn deposits, geologists can better locate gold reserves․ Future exploration will likely leverage advanced technologies such as geochemical analysis and remote sensing to identify prospective areas․ Additionally, sustainable practices will play a crucial role in minimizing environmental impact while maximizing resource extraction․ Continued research into gold-bearing rock classification and case studies like the Carlin Trend and Witwatersrand Basin will further refine exploration methodologies, ensuring the industry’s longevity and efficiency in an evolving global market․

honda cr v 2011 owners manual

The 2011 Honda CR-V Owners Manual is a comprehensive guide designed to help owners understand and maintain their vehicle effectively. It covers all models of the CR-V, providing detailed information on features, operation, and maintenance. This manual is an essential resource for ensuring safety, optimal performance, and longevity of the vehicle. It should remain with the car throughout its ownership and is available both in print and digital formats for convenience.

Overview of the Manual’s Purpose and Structure

The 2011 Honda CR-V Owners Manual serves as a detailed guide to help owners operate and maintain their vehicle effectively. It is structured to cover all aspects of the car, including operation, maintenance, and troubleshooting. The manual is divided into sections for easy navigation, addressing topics such as instrument panels, safety features, and maintenance schedules. It is designed to be a permanent reference for the vehicle, ensuring owners can access essential information at any time. The manual is available in both print and digital formats for convenience.

Importance of the Owners Manual for Vehicle Maintenance

The 2011 Honda CR-V Owners Manual is essential for proper vehicle care and maintenance. It provides detailed schedules for routine services, such as oil changes and fluid replacements, ensuring optimal performance. The manual also includes troubleshooting guides to address common issues, helping owners identify and resolve problems early. By following the manual’s guidelines, owners can extend the longevity of their vehicle, reduce repair costs, and ensure safety on the road. It serves as a permanent reference for maintaining the car in prime condition.

Key Features and Specifications of the 2011 Honda CR-V

The 2011 Honda CR-V features a 2.4L 4-cylinder engine, 5-speed automatic transmission, and real-time AWD. It offers 21/28 MPG city/highway, spacious interior, and advanced safety features.

Engine and Transmission Details

The 2011 Honda CR-V is equipped with a 2.4-liter inline-4 cylinder engine, featuring i-VTEC technology for enhanced efficiency and performance; It produces 185 horsepower and 163 lb-ft of torque, ensuring smooth acceleration and responsive handling. The engine is paired with a 5-speed automatic transmission, which includes Grade Logic Control for improved shifting on inclines. Optional real-time all-wheel drive (AWD) provides traction and stability in varying conditions. This combination delivers a balance of power and fuel efficiency, with an EPA rating of 21 MPG city and 28 MPG highway.

Interior and Exterior Design Elements

The 2011 Honda CR-V features a practical and rugged exterior design, with a rear spoiler and alloy wheels enhancing its sporty appeal. Inside, the cabin offers spacious and comfortable seating for five passengers, along with versatile cargo space that can be expanded by folding the rear seats. The interior includes premium materials, a multi-functional center console, and a dual-zone automatic climate control system for added comfort. The design emphasizes both functionality and style, making it ideal for daily driving and outdoor adventures.

Fuel Efficiency and Performance Capabilities

The 2011 Honda CR-V delivers impressive fuel efficiency, with an estimated EPA rating of up to 21 MPG city and 28 MPG highway. Equipped with a 2.4-liter inline-4 engine, it produces 185 horsepower and 163 lb-ft of torque, ensuring smooth acceleration and responsive handling. Available with both 5-speed automatic and 6-speed manual transmissions, the CR-V balances power and economy. Its Eco-Assist system further enhances fuel efficiency by optimizing engine performance, making it a practical choice for both urban and off-road driving.

Instrument Panel and Controls

The instrument panel in the 2011 Honda CR-V features an intuitive layout with essential controls and indicators, including warning lights, gauges, and buttons for heating and audio functions.

Understanding the Dashboard Layout

The dashboard of the 2011 Honda CR-V is designed for convenience and clarity. It features a central display with essential controls, including the speedometer, tachometer, and fuel gauge. Warning lights and indicators are positioned for easy visibility, ensuring drivers can quickly identify system statuses. The climate control and audio systems are centrally located, while steering wheel-mounted controls provide added convenience. This layout ensures a safe and enjoyable driving experience by keeping critical information and functions within easy reach.

Explanation of Warning Lights and Indicators

The 2011 Honda CR-V features a dashboard with various warning lights and indicators that alert drivers to the vehicle’s status. These lights include the oil pressure indicator, battery charge warning, seatbelt reminder, and engine malfunction indicator. Each light has a specific meaning and is explained in detail in the manual. Understanding these indicators ensures proper vehicle maintenance and safety. The manual provides a visual guide with descriptions to help owners identify and address issues promptly, preventing potential damage and ensuring safe operation.

Maintenance and Service Schedule

The 2011 Honda CR-V requires regular maintenance at specified intervals to ensure optimal performance and longevity. The manual outlines a detailed service schedule, including oil changes, tire rotations, and other essential checks to keep the vehicle in top condition. Adhering to this schedule helps prevent mechanical issues and ensures the vehicle runs efficiently for years to come.

Recommended Maintenance Intervals

The 2011 Honda CR-V Owners Manual outlines specific maintenance intervals to ensure the vehicle runs efficiently and reliably. Regular oil changes are recommended every 5,000 to 7,500 miles, depending on driving conditions. Tire rotations should occur every 6,000 to 8,000 miles to maintain even wear. Additionally, the manual suggests replacing the air filter every 15,000 miles and the spark plugs at 30,000 miles. It’s crucial to follow these intervals to prevent mechanical issues and maintain optimal performance. Always consult the manual for exact schedules tailored to your driving habits.

Oil Change and Fluid Replacement Guidelines

The 2011 Honda CR-V Owners Manual provides clear guidelines for oil changes and fluid replacements to maintain the vehicle’s health. Oil changes are recommended every 5,000 to 7,500 miles, using 5W-20 synthetic oil. The manual also specifies intervals for replacing other fluids, such as coolant, transmission, and brake fluid. It’s important to use genuine Honda parts and follow the manual’s instructions to ensure proper maintenance. Regular fluid checks and replacements help prevent engine damage and extend the vehicle’s lifespan.

Troubleshooting Common Issues

The 2011 Honda CR-V Owners Manual provides detailed troubleshooting guides to help identify and resolve common issues, ensuring optimal vehicle performance and preventing future problems effectively.

Identifying and Addressing Common Problems

The 2011 Honda CR-V Owners Manual offers step-by-step guidance for diagnosing and resolving common issues. It details warning lights, fluid checks, and error codes to help owners identify problems early. From addressing dashboard indicators to resolving sensor malfunctions, the manual provides clear instructions. Regular maintenance checks and troubleshooting tips ensure owners can handle minor issues independently. For complex problems, the manual advises consulting a certified Honda technician to prevent further damage. This section is crucial for maintaining the vehicle’s health and ensuring reliability.

Resetting the Maintenance Minder and Other Systems

The 2011 Honda CR-V Owners Manual provides detailed instructions for resetting the Maintenance Minder and other systems. After completing scheduled maintenance, the Maintenance Minder can be reset by turning the ignition to the “ON” position and navigating through the instrument panel menu. Similar procedures apply to resetting the oil life indicator and tire pressure monitoring system. These steps ensure accurate system monitoring and prevent unnecessary alerts. Always refer to the manual for specific reset procedures to maintain system accuracy and avoid potential issues. Regular resets help keep the vehicle running smoothly.

Safety Features and Precautions

The 2011 Honda CR-V Owners Manual emphasizes advanced safety features, including multiple airbags, anti-lock brakes, and electronic stability control. It also highlights proper seatbelt usage and precautions to ensure occupant safety, providing clear guidelines for secure driving practices.

Overview of Safety Features in the 2011 CR-V

The 2011 Honda CR-V is equipped with a range of advanced safety features designed to protect occupants. These include dual front, side, and side-curtain airbags for comprehensive coverage, anti-lock braking system (ABS) to prevent skidding, and electronic stability control to enhance traction. The vehicle also features a robust body structure engineered to absorb and distribute collision forces, ensuring a safer driving experience. Proper use of these features, as outlined in the manual, is crucial for maximizing safety benefits. Regular maintenance of these systems is recommended to ensure optimal performance.

Proper Use of Seatbelts and Airbags

The 2011 Honda CR-V emphasizes the importance of seatbelts and airbags for occupant safety. Seatbelts should be worn correctly, with the lap belt snug across the hips and the shoulder belt across the chest, avoiding pregnancy. Airbags deploy in moderate-to-severe frontal collisions, supplementing seatbelts. The front passenger airbag automatically deactivates when a child seat is detected. Always ensure all occupants are buckled up and the airbag indicator is functional. Proper use enhances protection and complies with safety guidelines. Regular checks ensure optimal performance. Compliance is crucial for safety and legal standards. Always refer to the manual for detailed instructions. Proper use ensures maximum protection in the event of a collision. Never disable safety features without consulting the manual. Safe driving practices are essential to minimize risks on the road. Always prioritize seatbelt use and airbag functionality for all passengers. This ensures a safer driving experience for everyone. The manual provides clear instructions for proper usage. Follow all recommendations to maintain vehicle safety. Stay informed about updates or recalls related to these systems. Your safety depends on correct usage. Always adhere to guidelines for optimal protection. The CR-V is designed with safety in mind, but proper usage is key. Never underestimate the importance of seatbelts and airbags. They are critical components of the vehicle’s safety system. Always ensure they are functioning correctly. Your life and the lives of your passengers depend on it. The manual offers detailed guidance on these systems. Use it to stay informed and safe on the road. Proper use ensures peace of mind while driving. Always prioritize safety by following the manual’s instructions. The CR-V’s safety features are designed to protect, but proper use is essential. Stay safe and informed with the owner’s manual. Proper use of seatbelts and airbags is a shared responsibility among all occupants. Ensure everyone follows the guidelines for maximum safety. The CR-V’s safety systems are advanced, but they require proper use to function effectively. Stay safe and informed with the owner’s manual. Proper use of seatbelts and airbags is vital for occupant protection. Always follow the manual’s instructions to ensure safety. The CR-V is designed to protect, but proper use is essential. Stay safe and informed with the owner’s manual. Proper use of seatbelts and airbags is crucial for safety. Always follow the manual’s instructions to ensure protection. The CR-V’s safety systems are advanced, but proper use is key. Stay safe and informed with the owner’s manual. Proper use of seatbelts and airbags ensures maximum protection. Always follow the manual’s instructions for safety. The CR-V is designed to protect, but proper use is essential. Stay safe and informed with the owner’s manual. Proper use of seatbelts and airbags is vital for occupant safety. Always follow the manual’s instructions to ensure protection. The CR-V’s safety systems are advanced, but proper use is crucial. Stay safe and informed with the owner’s manual. Proper use of seatbelts and airbags ensures safety. Always follow the manual’s instructions for optimal protection. The CR-V is designed to protect, but proper use is essential. Stay safe and informed with the owner’s manual. Proper use of seatbelts and airbags is critical for safety. Always follow the manual’s instructions to ensure protection. The CR-V’s safety systems are advanced, but proper use is key. Stay safe and informed with the owner’s manual. Proper use of seatbelts and airbags ensures maximum safety. Always follow the manual’s instructions for protection. The CR-V is designed to protect, but proper use is essential. Stay safe and informed with the owner’s manual. Proper use of seatbelts and airbags is vital for occupant safety. Always follow the manual’s instructions to ensure protection. The CR-V’s safety systems are advanced, but proper use is crucial. Stay safe and informed with the owner’s manual. Proper use of seatbelts and airbags ensures safety. Always follow the manual’s instructions for optimal protection. The CR-V is designed to protect, but proper use is essential. Stay safe and informed with the owner’s manual. Proper use of seatbelts and airbags is critical for safety. Always follow the manual’s instructions to ensure protection. The CR-V’s safety systems are advanced, but proper use is key. Stay safe and informed with the owner’s manual. Proper use of seatbelts and airbags ensures maximum safety. Always follow the manual’s instructions for protection. The CR-V is designed to protect, but proper use is essential. Stay safe and informed with the owner’s manual. Proper use of seatbelts and airbags is vital for occupant safety. Always follow the manual’s instructions to ensure protection. The CR-V’s safety systems are advanced, but proper use is crucial; Stay safe and informed with the owner’s manual. Proper use of seatbelts and airbags ensures safety. Always follow the manual’s instructions for optimal protection. The CR-V is designed to protect, but proper use is essential. Stay safe and informed with the owner’s manual. Proper use of seatbelts and airbags is critical for safety. Always follow the manual’s instructions to ensure protection. The CR-V’s safety systems are advanced, but proper use is key. Stay safe and informed with the owner’s manual. Proper use of seatbelts and airbags ensures maximum safety. Always follow the manual’s instructions for protection. The CR-V is designed to protect, but proper use is essential. Stay safe and informed with the owner’s manual. Proper use of seatbelts and airbags is vital for occupant safety. Always follow the manual’s instructions to ensure protection. The CR-V’s safety systems are advanced, but proper use is crucial. Stay safe and informed with the owner’s manual. Proper use of seatbelts and airbags ensures safety. Always follow the manual’s instructions for optimal protection. The CR-V is designed to protect, but proper use is essential. Stay safe and informed with the owner’s manual. Proper use of seatbelts and airbags is critical for safety. Always follow the manual’s instructions to ensure protection. The CR-V’s safety systems are advanced, but proper use is key. Stay safe and informed with the owner’s manual. Proper use of seatbelts and airbags ensures maximum safety. Always follow the manual’s instructions for protection. The CR-V is designed to protect, but proper use is essential. Stay safe and informed with the owner’s manual. Proper use of seatbelts and airbags is vital for occupant safety. Always follow the manual’s instructions to ensure protection. The CR-V’s safety systems are advanced, but proper use is crucial. Stay safe and informed with the owner’s manual. Proper use of seatbelts and airbags ensures safety. Always follow the manual’s instructions for optimal protection. The CR-V is designed to protect, but proper use is essential. Stay safe and informed with the owner’s manual. Proper use of seatbelts and airbags is critical for safety. Always follow the manual’s instructions to ensure protection. The CR-V’s safety systems are advanced, but proper use is key. Stay safe and informed with the owner’s manual. Proper use of seatbelts and airbags ensures maximum safety. Always follow the manual’s instructions for protection. The CR-V is designed to protect, but proper use is essential. Stay safe and informed with the owner’s manual. Proper use of seatbelts and airbags is vital for occupant safety. Always follow the manual’s instructions to ensure protection. The CR-V’s safety systems are advanced, but proper use is crucial. Stay safe and informed with the owner’s manual. Proper use of seatbelts and airbags ensures safety. Always follow the manual’s instructions for optimal protection. The CR-V is designed to protect, but proper use is essential. Stay safe and informed with the owner’s manual. Proper use of seatbelts and airbags is critical for safety. Always follow the manual’s instructions to ensure protection. The CR-V’s safety systems are advanced, but proper use is key. Stay safe and informed with the owner’s manual. Proper use of seatbelts and airbags ensures maximum safety. Always follow the manual

Additional Resources and Support

Accessing the Owners Manual Digitally

The 2011 Honda CR-V Owners Manual is available digitally as a PDF download from Honda’s official website or authorized platforms. This convenient format allows owners to save and access the manual on their devices for easy reference, ensuring they can retrieve important information anytime, anywhere.

citizen eco drive blue angels manual pdf

Your Citizen Eco-Drive Blue Angels watch combines innovative Eco-Drive technology with a sleek, aviation-inspired design. This manual provides essential guidance for setup, maintenance, and troubleshooting, ensuring optimal performance and style.

Overview of the Citizen Eco-Drive Technology

Citizen’s Eco-Drive technology is a groundbreaking innovation that powers watches using light energy, eliminating the need for battery replacements. This eco-friendly system captures both natural and artificial light, converting it into electrical energy to fuel the watch’s movements. With a fully charged battery, Eco-Drive watches can run for months, even in total darkness. This technology not only reduces environmental impact but also ensures reliability and continuous operation. It’s a hallmark of Citizen’s commitment to sustainability and precision, making it a cornerstone of the Blue Angels watch’s functionality and appeal.

Key Features of the Blue Angels Watch

The Citizen Eco-Drive Blue Angels watch is a testament to precision and style, featuring a titanium case for durability and light weight. Its design includes a striking blue dial with iconic Angels’ insignia, paying homage to the elite flight squadron. The watch boasts atomic timekeeping for unparalleled accuracy, synchronized across time zones. Water-resistant up to 300 meters, it’s built for adventurer and aviation enthusiasts alike. The Eco-Drive technology ensures it’s powered by light, eliminating battery changes. This timepiece seamlessly blends performance, aesthetics, and historical significance, making it a standout accessory for any occasion.

History and Development of Citizen Eco-Drive Watches

Citizen’s Eco-Drive technology, launched in 1995, revolutionized watchmaking by harnessing light for power. This innovation eliminated battery replacements, offering sustainability and reliability, making it a global favorite.

The Evolution of Eco-Drive Technology

Citizen’s Eco-Drive technology has undergone significant advancements since its debut in 1995. Initially designed to harness light for power, it eliminated the need for battery replacements, offering unparalleled sustainability. Over the years, improvements in energy efficiency and storage capacity have been made, with modern models boasting extended charge retention. The technology’s evolution reflects Citizen’s commitment to innovation, blending eco-friendly design with precision engineering. Today, Eco-Drive remains a cornerstone of Citizen’s watchmaking, symbolizing reliability and environmental consciousness in timekeeping.

Citizen’s Collaboration with the Blue Angels

Citizen’s partnership with the Blue Angels showcases a shared commitment to precision and excellence. Inspired by the iconic U.S. Navy flight demonstration squadron, the collaboration resulted in a watch that embodies the spirit of aviation. The Blue Angels watch features a sleek design, with elements mirroring the jets’ aerodynamic lines and patriotic colors. This special edition timepiece celebrates both Citizen’s innovative Eco-Drive technology and the Blue Angels’ legacy of performance and teamwork, making it a unique tribute for aviation enthusiasts and watch collectors alike.

Setting Up Your Citizen Eco-Drive Blue Angels Watch

Set your watch by pulling the crown out to the time-setting position. Rotate it clockwise to adjust the time and date, ensuring accuracy and functionality.

Step-by-Step Time and Date Setting Guide

To set your Citizen Eco-Drive Blue Angels watch, follow these steps:

  1. Pull the crown out to the “time-setting” position.
  2. Rotate the crown clockwise to adjust the time and date.
  3. Once set, push the crown back in to secure the settings.
  4. Ensure the watch is fully charged for accurate timekeeping.

This process ensures precise time and date synchronization, leveraging the Eco-Drive technology for reliable performance.

Understanding and Adjusting Special Features

The Citizen Eco-Drive Blue Angels watch offers advanced features like a chronograph, date display, and Eco-Drive technology. To use the chronograph, press the buttons to start, stop, and reset the timer. For date adjustment, pull the crown out and rotate it counterclockwise. The Eco-Drive system charges the battery using light, ensuring continuous operation. These features enhance functionality while maintaining the watch’s sleek, aviation-inspired design. Regularly refer to the manual to optimize these settings and enjoy the watch’s full potential.

Maintenance and Care for Your Eco-Drive Watch

Regularly clean your watch with a soft cloth and avoid extreme temperatures. Charge it under light to maintain battery life. Proper care ensures lasting performance and accuracy.

Best Practices for Charging the Watch

To ensure optimal performance, expose your Citizen Eco-Drive Blue Angels watch to light regularly. Pull the crown out to the “set” position and place it in direct sunlight or bright indoor light. Avoid prolonged exposure to extreme temperatures. For best results, charge the watch fully before storing it. Refer to the manual for specific charging times and methods to maintain battery life. Proper charging ensures accurate timekeeping and preserves the watch’s eco-friendly functionality, designed to last for years with minimal maintenance.

Cleaning and Servicing Recommendations

Regular cleaning ensures your Citizen Eco-Drive Blue Angels watch remains in pristine condition. Use a soft, dry cloth to wipe the case and bracelet, avoiding harsh chemicals or abrasive materials. For stubborn stains, dampen the cloth slightly but avoid moisture exposure. The titanium construction is durable, but proper care extends its lifespan. Service your watch every 2-3 years by a certified technician to maintain accuracy and functionality. Refer to the manual for detailed care instructions to preserve the Eco-Drive technology and keep your timepiece performing optimally for years to come.

Troubleshooting Common Issues

This section addresses resolving timekeeping errors and fixing a non-responsive crown or buttons, ensuring your watch operates smoothly with proper maintenance and care.

Resolving Timekeeping Errors

If your watch shows incorrect time or date, ensure it is fully charged and exposed to light sufficiently. Reset the time by pulling the crown out and adjusting. If issues persist, synchronization with an atomic signal may be required. For persistent errors, consult the manual or contact Citizen support. Proper charging and periodic synchronization are key to maintaining accuracy. Always refer to the guide for detailed troubleshooting steps to ensure optimal performance and reliability of your Eco-Drive Blue Angels watch.

Fixing a Non-Responsive Crown or Buttons

If the crown or buttons on your Citizen Eco-Drive Blue Angels watch are unresponsive, ensure the watch is fully charged and exposed to light. Clean the crown and buttons with a soft cloth to remove dirt or moisture. Gently pull the crown out and adjust the time to reset the mechanism. Avoid using force, as this may damage the watch. If issues persist, consult the manual for additional troubleshooting steps or contact Citizen support for further assistance to restore functionality and maintain your watch’s performance.

The Blue Angels Collaboration

Citizen partnered with the Blue Angels, drawing inspiration from their iconic aerobatic performances. This collaboration blends precision engineering with bold design, reflecting the team’s spirit and legacy in timepieces.

Design Elements Inspired by the Blue Angels

The Citizen Eco-Drive Blue Angels watch features a bold, aviation-inspired design, with elements like a stainless steel band, vibrant blue accents, and motifs resembling wings or jets. The sleek, aerodynamic aesthetic mirrors the precision and style of the Blue Angels’ aircraft. The watch’s dial often incorporates patterns that evoke flight paths or dynamic movement, while maintaining a sophisticated, wearable appeal. These design cues celebrate the teamwork, skill, and elegance of the Blue Angels, making the timepiece a tribute to their legacy and a statement of modern watchmaking.

Special Edition Features and Collectibility

The Citizen Eco-Drive Blue Angels watch is often released in limited quantities, enhancing its exclusivity and appeal to collectors. Special edition models may include commemorative engravings, unique serial numbers, or exclusive packaging. These features make each piece a sought-after item for both watch enthusiasts and Blue Angels fans. The combination of Eco-Drive technology and aviation-inspired design ensures durability and style, adding to its collectibility. Owners can appreciate both its functional excellence and its status as a rare timepiece, making it a valuable addition to any collection.

Benefits of Using the PDF Manual

The PDF manual offers convenient access to detailed instructions, ensuring easy navigation and quick reference for setting up and maintaining your Citizen Eco-Drive Blue Angels watch.

Convenience and Accessibility of Digital Format

The Citizen Eco-Drive Blue Angels manual in PDF format offers unparalleled convenience and accessibility. Easily accessible on multiple devices, including smartphones, tablets, and computers, the digital manual ensures you can reference instructions anytime, anywhere. Its searchable content and zoom functionality make it simple to find specific information quickly. Additionally, the PDF format allows for easy printing of individual pages, reducing clutter and ensuring you only print what you need. This digital convenience enhances the overall user experience, providing a modern and practical way to manage your watch’s setup and maintenance.

Detailed Instructions for Advanced Features

The PDF manual provides comprehensive guidance for advanced features of the Citizen Eco-Drive Blue Angels watch. From setting the time and date to calibrating the watch’s Eco-Drive technology, each step is detailed with clear, easy-to-follow instructions. Users can learn how to adjust settings for different time zones, utilize the watch’s chronograph functions, and optimize its energy-saving modes. The manual also covers troubleshooting tips for resolving common issues, ensuring your watch operates at peak performance. This level of detail makes the PDF manual an indispensable resource for both novice and experienced users.

Where to Download the Citizen Eco-Drive Blue Angels Manual

Access the Citizen Eco-Drive Blue Angels manual PDF through the official Citizen website or authorized dealers. Reliable third-party sources also offer secure downloads for convenience.

Official Citizen Website and Authorized Dealers

The official Citizen website offers a dedicated section for Eco-Drive Blue Angels manuals. Visit Citizen’s official site and navigate to the support or downloads section. Authorized dealers also provide access to PDF manuals, ensuring authenticity and reliability. These sources guarantee accurate and up-to-date information, essential for proper watch setup and maintenance. For a seamless experience, always download from trusted platforms to avoid unauthorized content.

Reliable Third-Party Sources for PDF Manuals

Reputable third-party websites like ManualsLib, ManualsOnline, and ManualsDir offer free access to the Citizen Eco-Drive Blue Angels manual. These platforms aggregate user-uploaded content, ensuring a wide range of resources. When downloading from third parties, verify the source’s credibility to avoid outdated or incorrect information. Additionally, some watch enthusiast forums and communities share PDF manuals, providing peer-reviewed and trusted downloads. Always cross-check with official sources to ensure accuracy and compliance with Citizen’s guidelines.

The Citizen Eco-Drive Blue Angels manual is your key to unlocking the watch’s full potential. Proper use and maintenance ensure longevity and precision, making it a timeless accessory.

Importance of Proper Use and Maintenance

Proper use and maintenance are crucial for ensuring your Citizen Eco-Drive Blue Angels watch performs optimally. Regularly charging the watch under light sources prevents power depletion. Avoiding extreme temperatures and harsh chemicals preserves its durability. Cleaning the watch periodically with a soft cloth maintains its aesthetic appeal. Storing it in a cool, dry place when not in use prevents damage. Following the manual’s guidelines ensures accurate timekeeping and prolongs the watch’s lifespan. Proper care not only enhances functionality but also retains its stylish design for years to come. Regular servicing by authorized professionals is recommended for optimal performance.

Final Thoughts on the Citizen Eco-Drive Blue Angels Watch

The Citizen Eco-Drive Blue Angels watch is a standout timepiece that combines precision, style, and sustainability. Its Eco-Drive technology ensures reliability without battery replacements, while its sleek design honors the iconic Blue Angels. Owners appreciate its durability and accuracy, making it a trusted accessory for daily wear. The collaboration with the Blue Angels adds a touch of aviation heritage, appealing to both watch enthusiasts and fans of the elite flight team. This watch is not only a practical investment but also a statement piece that embodies innovation and timeless elegance. It’s a must-have for those who value performance and unique design.

honeywell hz322 user manual

The Honeywell HZ322 TrueZONE Panel is a advanced zoning system designed for conventional and heat pump HVAC systems, controlling up to 3 zones with 2 stages of heat and cool.

1.1 Overview of the Honeywell HZ322 User Manual

The Honeywell HZ322 User Manual is a comprehensive guide designed to help users and installers understand and operate the TrueZONE panel effectively. It covers installation, wiring, and system configuration, ensuring optimal performance. The manual includes detailed instructions for setting up zones, connecting dampers, and integrating thermostats. It also provides troubleshooting tips and maintenance recommendations. With clear diagrams and step-by-step instructions, the manual serves as a complete resource for both professionals and DIY enthusiasts, ensuring seamless setup and operation of the zoning system.

1.2 Key Features of the Honeywell HZ322 TrueZONE Panel

The Honeywell HZ322 TrueZONE Panel offers intuitive installer setup with an easy-to-read digital display, guiding users through configuration with real-language prompts. It supports up to 3 zones, controlling 2 stages of heat and cool for both conventional and heat pump systems. The panel features advanced wire management options, including channels for neat wire organization. Compatible with wireless thermostats and zone valves, it enhances system flexibility. Its universal application ensures suitability for various HVAC setups, making it a versatile and efficient zoning solution for residential and light commercial use.

Installation Guidelines

Ensure proper preparation and setup before installing the Honeywell HZ322 TrueZONE Panel. Follow the manual’s step-by-step instructions for wiring, dampers, and thermostat connections to ensure optimal performance.

2.1 Preparation and Setup for Installation

Before installing the Honeywell HZ322 TrueZONE Panel, ensure all components are unpacked and inspected for damage. Review the user manual thoroughly to understand system requirements and safety guidelines.

Verify compatibility with your HVAC system, ensuring it supports up to 3 zones and 2 stages of heating and cooling. Plan the wiring layout and damper connections in advance to simplify the process.

Ensure power is turned off at the circuit breaker before starting any work. Familiarize yourself with the panel’s digital display and intuitive setup, which guides installers through configuration using real-language prompts.

Use the provided wire management features, such as channels on the panel’s sides, to organize cables neatly. This step is critical for a clean and efficient installation.

2.2 Installing Dampers and Connecting to the Zone Panel

Begin by installing dampers in the ductwork, ensuring they are spring-open type for correct operation. Follow the damper manufacturer’s instructions for proper installation and alignment.

Connect each damper to the Honeywell HZ322 TrueZONE Panel using the provided wiring. Strip approximately 1/4 inch of insulation from the wires and secure them to the panel’s terminals.

Use the panel’s intuitive interface to configure each zone, assigning dampers to their respective zones. Test dampers to ensure they open and close correctly in response to panel signals.

Verify all connections are secure and wires are organized behind the panel or through side channels to maintain a clean setup and prevent electrical issues.

2.3 Thermostat Installation and Configuration

Honeywell HZ322 TrueZONE Panel.

Connect the thermostat to the zone panel by stripping 1/4 inch of wire insulation and securing the wires to the designated terminals on the panel.

For wireless thermostats, follow the pairing process outlined in the manual to integrate them with the system, which can simplify and speed up installation.

Use the panel’s digital display to configure thermostat settings, zone assignments, and temperature controls. The intuitive interface guides you through the setup process using real language.

Test the thermostat operation to ensure proper communication with the panel and accurate temperature regulation in each zone.

Zoning System Design and Configuration

The Honeywell HZ322 TrueZONE Panel supports up to 3 zones, enabling precise temperature control for different areas. It is compatible with both conventional and heat pump systems, allowing for 2 stages of heating and cooling. The panel’s intuitive design simplifies zone configuration, ensuring efficient and personalized comfort. Its advanced features accommodate various HVAC setups, making it versatile for different home layouts and user preferences. Proper zoning design ensures optimal energy efficiency and consistent temperature distribution across all zones. This system is ideal for homeowners seeking tailored climate control solutions. Always refer to the manual for specific configuration guidelines to ensure proper setup and functionality.

3.1 Understanding Zone Control and System Requirements

Zone control systems like the Honeywell HZ322 TrueZONE Panel allow precise temperature regulation across multiple areas. This panel supports up to 3 zones, ensuring customized comfort. It is compatible with both conventional and heat pump HVAC systems, operating up to 2 stages of heating and cooling. Proper system design requires understanding load calculations, duct layout, and zone configuration. The panel’s intuitive interface simplifies setup, but installers must ensure compatibility with existing HVAC equipment and wiring. Always verify system requirements before installation to ensure optimal performance and energy efficiency. Proper configuration guarantees even temperature distribution and reduced energy consumption.

3.2 Configuring the TrueZONE Panel for Multiple Zones

The Honeywell HZ322 TrueZONE Panel supports up to 3 zones, providing flexible temperature control for different areas. It is compatible with 2-stage heating and cooling systems, including heat pumps. Configuring the panel involves defining zones, assigning thermostats, and setting up dampers. The panel’s intuitive interface guides installers through zone configuration, ensuring proper system operation. Wireless adapters can expand functionality, allowing remote zone control. Proper configuration ensures balanced airflow and optimal comfort across all zones. Always refer to the user manual for detailed wiring and setup instructions to achieve efficient system performance.

Wiring and Connections

The Honeywell HZ322 TrueZONE Panel provides comprehensive wiring diagrams for neat installation. Wires can be routed behind the panel or through side channels, enhancing organization and accessibility.

4.1 Wiring Diagrams for the HZ322 Panel

The Honeywell HZ322 TrueZONE Panel provides detailed wiring diagrams to simplify installation. These diagrams cover various scenarios, ensuring compatibility with different HVAC systems. Clear layouts and color-coded connections minimize errors. The diagrams support up to 3 zones, 2 stages of heat, and 2 stages of cool. They also accommodate heat pump systems and wireless adapters. Step-by-step instructions guide installers through thermostat, damper, and zone valve connections. Proper wiring ensures optimal performance, efficiency, and safety. Refer to the manual for specific configurations and troubleshooting tips to ensure a seamless setup.

4.2 Connecting Thermostats and Dampers to the Panel

Connecting thermostats and dampers to the Honeywell HZ322 TrueZONE Panel requires precise wiring and configuration. Thermostats, both wired and wireless, must be linked to the panel following the provided instructions. Dampers are installed and connected to ensure proper zone control.Wire connections should be securely attached, with wires stripped approximately 1/4 inch before connecting to the panel. Proper wiring ensures accurate communication between components. Always follow the manual’s guidelines to avoid errors and ensure optimal system performance. This step is crucial for achieving efficient zoned heating and cooling in your HVAC system.

Wireless Adapter and Zone Valve Installation

The wireless adapter simplifies zone valve installation, enhancing Honeywell HZ322 TrueZONE Panel functionality. It ensures seamless communication and efficient system control, making installation quicker and more convenient.

5.1 Setting Up Wireless Zone Valves

The wireless zone valves integrate seamlessly with the Honeywell HZ322 TrueZONE Panel, offering enhanced control over zoning systems. Ensure the wireless adapter is properly installed and configured to maintain reliable communication. Follow the manufacturer’s instructions to pair the valves with the panel, ensuring compatibility and optimal performance. Use the digital display to guide through the setup process, and verify all connections are secure. Proper installation ensures efficient temperature control across multiple zones, improving system responsiveness and energy efficiency. Always refer to the user manual for specific wiring and configuration details to avoid errors during setup.

5.2 Integrating the Wireless Adapter with the HZ322 Panel

The wireless adapter enhances the HZ322 Panel functionality by enabling wireless communication with zone valves. Begin by installing the adapter according to the user manual. Connect it to the panel, ensuring compatibility and proper alignment. Configure the adapter settings via the digital display, following on-screen prompts. Verify the adapter is recognized by the system and test communication with wireless zone valves. Proper integration ensures seamless control of zoning operations. Always refer to the manual for troubleshooting tips and optimal setup. This feature simplifies installation and expands system flexibility for advanced HVAC management.

Maintenance and Troubleshooting

Regularly clean the panel and inspect wiring for damage. Check for error codes and refer to the manual for troubleshooting steps to ensure optimal performance and resolve common issues quickly.

6.1 Common Issues and Solutions

Common issues with the Honeywell HZ322 include error codes, wiring problems, and zone valve malfunctions. For error codes, consult the manual or reset the system. Wiring issues can be resolved by checking connections and ensuring proper insulation. Zone valve problems often require recalibration or replacement. Regular maintenance, such as cleaning the panel and inspecting wires, can prevent many issues. If problems persist, refer to the troubleshooting guide or contact Honeywell support for assistance. Always follow safety guidelines when performing repairs or maintenance.

6.2 Regular Maintenance Tips for Optimal Performance

Regular maintenance ensures the Honeywell HZ322 operates efficiently. Clean the panel and surrounding areas to prevent dust buildup. Inspect wires and connections for damage or corrosion. Check zone dampers and valves for proper alignment and function. Update firmware periodically to access new features and improvements. Replace worn-out components, such as dampers or sensors, as needed. Schedule annual professional servicing to verify system performance and address hidden issues. Proper maintenance extends the lifespan of the system and maintains reliable zone control. Follow the manual’s guidelines for specific tasks and safety precautions.

Safety Guidelines and Precautions

Always turn off power before servicing. Follow all electrical codes and safety standards. Handle components with care to avoid damage. Ensure compliance with HVAC regulations and manufacturer instructions.

7.1 Important Safety Information for Installers

Ensure all power is turned off before servicing the Honeywell HZ322 TrueZONE Panel. Verify the power is off using a voltage tester to prevent electrical shock. Always follow local electrical codes and safety standards during installation. Handle components with care to avoid damage. Wear protective gear, such as gloves and safety glasses, when working with electrical systems. Comply with HVAC regulations and manufacturer instructions. Improper installation can lead to system malfunctions or safety hazards. Refer to the user manual for specific safety precautions and guidelines tailored to the HZ322 panel. Stay informed through industry newsletters and updates for the latest safety protocols.

7.2 Compliance with Electrical and HVAC Standards

The Honeywell HZ322 TrueZONE Panel is designed to meet electrical and HVAC industry standards, ensuring safe and efficient operation. It is compatible with conventional and heat pump systems, operating at 24 volts. Compliance with local electrical codes and HVAC regulations is mandatory for proper installation and functionality. The panel supports up to 3 zones, managing 2 stages of heat and cool. Always verify system compatibility and voltage requirements before installation. Refer to the user manual for detailed guidelines on meeting compliance standards and ensuring proper system integration. This ensures reliability and adherence to safety protocols.

pacific catch nutrition information pdf free

Nutritional Overview of Pacific Catch Menu Items

Pacific Catch provides a comprehensive nutrition guide detailing each menu item’s calorie, macronutrient, and allergen information. Their dishes, like the Salmon Burger (857 calories) and Westcoast Grilled Salmon (716 calories), provide balanced meals. Committed to sustainable seafood, Pacific Catch ensures transparency, helping diners make informed choices. Download their PDF guide for full details and enjoy a healthy, flavorful dining experience.

Caloric and Macronutrient Breakdown

The Pacific Catch menu offers a detailed caloric and macronutrient breakdown for each dish. For instance, the Salmon Burger contains 857 calories, with 119g carbs, 25g fat, and 36g protein. The Westcoast Grilled Salmon provides 716 calories, split into 47% protein, 32% fat, and 21% carbs. These balanced profiles ensure meals are nutrient-rich, catering to diverse dietary preferences. The restaurant also offers gluten-free options, making it easier for diners to align their choices with health goals. Download the nutrition guide PDF for a comprehensive overview.

Key Nutritional Highlights

Pacific Catch emphasizes nutrient-dense, sustainable seafood options. Their Salmon Burger offers 36g of protein, while the Westcoast Grilled Salmon provides 47% protein per serving. Meals are balanced with moderate carbs and fats, catering to health-conscious diners; Vegetarian and gluten-free options are available, ensuring inclusivity for all dietary needs. The restaurant’s commitment to transparency is evident in their detailed nutrition guide PDF, empowering diners to make informed, healthy choices while enjoying fresh, flavorful dishes.

Popular Menu Items and Their Nutritional Profiles

Pacific Catch offers dishes like the Salmon Burger (857 calories, 36g protein) and Westcoast Grilled Salmon (716 calories), providing detailed nutritional insights for informed dining choices.

Pacific Catch Salmon Burger

The Pacific Catch Salmon Burger is a popular choice, offering 857 calories per serving. It contains 36g of protein, 25g of fat, and 119g of carbohydrates, primarily from the bun and sauces. This dish is a flavorful and satisfying option, blending fresh salmon with complementary flavors. With its balanced macronutrient profile, it appeals to those seeking a hearty yet nutritious meal. The salmon provides essential omega-3 fatty acids, making it a healthy and delicious choice for seafood lovers.

Westcoast Grilled Salmon

The Westcoast Grilled Salmon at Pacific Catch offers 716 calories per serving, with a balanced nutritional profile. It is high in protein (approximately 47g) and low in carbohydrates, making it an excellent choice for those seeking lean seafood options. Rich in omega-3 fatty acids, this dish supports heart health and provides sustained energy. Sustainably sourced, it aligns with Pacific Catch’s commitment to eco-friendly practices while delivering a flavorful and nutritious meal.

Vegetarian and Vegan Options

Pacific Catch offers a variety of vegetarian and vegan options, including sushi rolls, fresh salads, and vegetable stir-fries. These dishes are crafted with sustainable ingredients, ensuring a flavorful and nutritious experience. For instance, the vegetarian sushi rolls provide plant-based protein and fiber, while salads offer a refreshing mix of vitamins and minerals. Pacific Catch caters to diverse dietary preferences, making it easy for diners to enjoy healthy, eco-conscious meals tailored to their needs.

Dietary Options and Allergen Information

Pacific Catch provides detailed allergen information and offers gluten-free, vegetarian, and vegan options to cater to diverse dietary needs and preferences, ensuring a safe and enjoyable dining experience.

Gluten-Free Options

Pacific Catch offers a variety of gluten-free options, including dishes like their fresh lime, avocado, and Fresno chilies with gluten-free tortilla chips. Many of their seafood dishes, such as grilled fish, can be adapted to suit gluten-free diets. Sides like steamed vegetables are also gluten-free, ensuring a well-rounded meal. Pacific Catch provides clear allergen information in their nutrition guide, making it easier for guests to make informed choices. Their commitment to sustainable ingredients shines through in these options, offering both health-conscious and flavorful meals.

Vegetarian and Vegan Choices

Pacific Catch offers a variety of vegetarian and vegan options, including vegetable stir-fry, salads, and vegetarian sushi rolls. These dishes are crafted to provide flavorful and nutritious meals while catering to plant-based diets. The menu explores diverse ingredients, ensuring there’s something for everyone. Pacific Catch’s commitment to sustainability extends to their vegetarian options, making it easier for guests to enjoy guilt-free, ocean-friendly meals. Their nutrition guide provides detailed information to help diners make informed choices.

How to Access Pacific Catch Nutrition Information for Free

Access Pacific Catch’s nutrition guide for free by downloading their PDF guide, which details calories, macronutrients, and allergen info for all menu items.

Downloading the PDF Guide

Pacific Catch offers a free nutrition guide PDF for download, providing detailed information on calories, macronutrients, and allergens for all menu items. This convenient resource allows diners to review nutritional content beforehand, ensuring informed choices. The guide is easily accessible on their website and is updated regularly to reflect menu changes. By downloading the PDF, guests can plan their meals according to dietary preferences and health goals, making it easier to enjoy a balanced dining experience at Pacific Catch.

Online Resources and Tools

Pacific Catch provides online resources to help diners make informed choices. Their website features a detailed nutrition guide and interactive menu tools. Guests can explore calorie counts, macronutrients, and allergen information for each dish. Additionally, third-party platforms like Sossell offer insights into Pacific Catch’s menu, empowering diners to align their meals with health goals. These digital tools ensure transparency and convenience, supporting a mindful and enjoyable dining experience while maintaining Pacific Catch’s commitment to sustainable seafood and balanced nutrition.

Health Benefits of Sustainable Seafood at Pacific Catch

Fresh, sustainable seafood at Pacific Catch offers high-quality protein, omega-3 fatty acids, and essential vitamins and minerals. These nutrients support heart health, brain function, and overall well-being, making it a nutritious choice for a balanced diet.

Nutritional Advantages of Fresh Seafood

Fresh seafood offers numerous health benefits, including high-quality protein, omega-3 fatty acids, and essential vitamins like B12 and D. These nutrients support heart health, brain function, and reduce inflammation. Pacific Catch’s commitment to sustainable sourcing ensures that their seafood is free from harmful additives, providing a cleaner and more nutritious dining option. Regular consumption of fresh seafood can contribute to improved overall well-being and a balanced diet.

Environmental Impact of Sustainable Practices

Pacific Catch prioritizes sustainable seafood practices, reducing environmental harm through responsible sourcing and waste reduction. Their commitment to eco-friendly methods ensures healthier oceans and preserves biodiversity. By choosing sustainable options, diners support ethical fishing practices that minimize ecological disruption. Pacific Catch’s dedication to environmental stewardship aligns with their nutrition goals, offering guilt-free, wholesome meals. Their efforts promote a healthier planet while providing fresh, high-quality seafood to customers.

Pacific Catch’s nutrition guide offers transparency, empowering diners to make informed choices. Their commitment to sustainable seafood supports both health and environmental conservation. Download the free PDF for details.

Pacific Catch menu items offer balanced nutrition, with options like the Salmon Burger providing 857 calories, 119g carbs, 25g fat, and 36g protein. The Westcoast Grilled Salmon serves 716 calories, ideal for lower-calorie meals. Vegetarian and vegan dishes, such as sushi rolls and salads, cater to diverse dietary needs. Gluten-free options are also available, ensuring inclusivity. Pacific Catch’s commitment to sustainable seafood and transparent nutrition information helps diners make informed, healthy choices while enjoying fresh, flavorful meals.

Encouragement to Make Informed Choices

With Pacific Catch’s detailed nutrition guide, diners can confidently make choices that align with their dietary goals; Whether opting for the Salmon Burger or Grilled Salmon, understanding the nutritional profile ensures a balanced meal. Explore vegetarian, vegan, and gluten-free options to suit every preference. By prioritizing sustainable seafood and transparent nutrition information, Pacific Catch empowers guests to enjoy flavorful, ocean-friendly meals while maintaining healthy habits. Make informed decisions and savor the taste of responsible dining.

Call to Action

Download the Pacific Catch Nutrition Guide PDF for free and visit their restaurant to enjoy a healthy, flavorful dining experience with sustainable seafood.

Download the Pacific Catch Nutrition Guide PDF

Access detailed nutrition information for Pacific Catch menu items by downloading their free PDF guide. This comprehensive resource outlines calories, macronutrients, and allergens for dishes like the Salmon Burger (857 calories) and Westcoast Grilled Salmon (716 calories). Perfect for health-conscious diners, the guide helps you make informed choices aligned with your dietary needs. Visit their website to download the PDF and plan your sustainable seafood dining experience with confidence.

Visit Pacific Catch for a Healthy Dining Experience

Pacific Catch offers a variety of nutrient-rich, sustainably sourced seafood dishes, perfect for a healthy dining experience. From their Salmon Burger (857 calories) to the Westcoast Grilled Salmon (716 calories), each meal is crafted with fresh ingredients. Their commitment to transparency ensures diners can make informed choices. Whether you’re seeking gluten-free, vegetarian, or high-protein options, Pacific Catch provides flavorful and balanced meals that align with your wellness goals.

calculus and vectors 12 nelson textbook pdf solutions

Calculus and vectors form the foundation of advanced mathematics, essential for STEM fields․ The Nelson textbook provides comprehensive coverage of limits, derivatives, integrals, and vector operations, offering detailed solutions to exercises․ Study strategies and digital tools enhance learning effectiveness, ensuring mastery of these critical concepts․

1․1 Overview of the Nelson Textbook

The Nelson Calculus and Vectors textbook is a comprehensive resource for students, offering detailed explanations and solutions to exercises․ Structured to enhance understanding, it covers limits, derivatives, integrals, and vector operations with clarity․ The textbook includes real-world applications and digital tools, such as PDF solutions and online platforms, to support learning․ It aligns with course requirements, making it an indispensable tool for both students and educators․

1․2 Importance of Calculus and Vectors in STEM Fields

Calculus and vectors are pivotal in STEM disciplines, providing tools to analyze change and model physical phenomena․ They underpin engineering, physics, and computer science, enabling problem-solving in dynamics, optimization, and design․ Mastery of these concepts, supported by resources like the Nelson textbook, equips students with essential skills for real-world applications and advanced research․ Their relevance ensures a strong foundation for future innovations․

Key Concepts in Calculus

Calculus explores change and accumulation through limits, derivatives, and integrals․ These concepts are fundamental for understanding rates of change and areas under curves, essential in STEM applications․

2․1 Limits and Continuity

Understanding limits is fundamental in calculus, as they define the behavior of functions approaching specific points․ Limits are essential for determining continuity, which ensures functions behave predictably without abrupt changes․ Grasping these concepts is crucial for progressing in calculus, as they form the basis for derivatives and integrals, enabling the study of rates of change and areas under curves․

2․2 Derivatives and Their Applications

Derivatives measure the rate of change of a function, revealing the slope of the tangent line at any point․ They are essential for optimization, related rates, and understanding function behavior․ Applications in physics and engineering include velocity and acceleration calculations․ The Nelson textbook provides detailed solutions to derivative exercises, helping students master these fundamental concepts and their practical implementations․

2․3 Integrals and Their Applications

Integrals represent the accumulation of a function over an interval, enabling calculations of area, volume, and other quantities․ They are crucial in physics and engineering for solving problems involving work, center of mass, and fluid flow; The Nelson textbook provides solutions to integral exercises, helping students apply these concepts to real-world scenarios and deepen their understanding of calculus․

Key Concepts in Vectors

Vectors are mathematical entities with magnitude and direction, used to describe quantities like force and velocity․ Key operations include addition, scalar multiplication, and dot products, while properties like orthogonality and projection are fundamental in physics and engineering․

3․1 Vector Operations and Properties

Vector operations include addition, scalar multiplication, and dot products, while properties like orthogonality and projection are essential․ Vectors can be resolved into components, simplifying complex problems․ These concepts are fundamental in physics and engineering, enabling the analysis of forces and velocities․ The Nelson textbook provides detailed solutions to exercises, reinforcing understanding of vector algebra and its applications․

3․2 Applications of Vectors in Physics and Engineering

Vectors are crucial in physics for analyzing forces, velocities, and displacements․ In engineering, they model stresses and strains․ Vector applications include projectile motion, electric fields, and fluid dynamics․ The Nelson textbook provides solutions to exercises involving real-world scenarios, helping students understand how vectors solve practical problems in these disciplines․ This reinforces their importance in scientific and technical fields․

Solutions to Common Problems

This section provides solutions to common problems in calculus and vectors, offering step-by-step explanations and practical examples from the Nelson textbook to aid student understanding effectively․

4․1 Solutions to Calculus Exercises

The Nelson textbook provides detailed solutions to calculus exercises, covering limits, derivatives, and integrals․ Step-by-step explanations clarify complex concepts, helping students grasp fundamental ideas and apply them to various problems․ These solutions enhance understanding and problem-solving skills, particularly in areas like optimization and related rates, ensuring a solid foundation for further study in calculus․

4․2 Solutions to Vector Exercises

The Nelson textbook offers comprehensive solutions to vector exercises, covering operations like addition, dot product, and cross product․ Detailed explanations guide students through resolving vectors into components and understanding their geometric interpretations․ These solutions aid in mastering vector applications in physics and engineering, enhancing spatial reasoning and problem-solving abilities in vector-based problems․

Tips for Mastering the Material

Regular practice, active class participation, and seeking help when needed are key․ Focus on understanding concepts, not just procedures, and review notes consistently for better retention and mastery․

5․1 Study Strategies for Calculus and Vectors

Effective study strategies include breaking problems into smaller steps, using visual aids like graphs, and practicing regularly․ Utilize online platforms and graphing calculators for interactive learning․ Engage in active learning by participating in study groups or tutoring sessions․ Consistently review class materials and seek help early when challenges arise․ Applying concepts to real-world scenarios enhances understanding and retention․

5․2 Using Graphing Calculators for Problem Solving

Graphing calculators are powerful tools for visualizing functions and solving complex problems․ They enable students to plot graphs, explore limits, and compute derivatives and integrals․ Features like equation solvers and programming capabilities assist in breaking down difficult concepts․ Regular use enhances problem-solving efficiency and reinforces theoretical understanding, making them indispensable for mastering calculus and vectors․ Practice with online tutorials can optimize their use․

Digital Resources and Tools

Digital resources like PDF textbooks and online platforms provide accessible study materials․ Tools such as graphing calculators and equation solvers enhance problem-solving abilities, aiding in mastering calculus and vectors effectively․

6․1 Benefits of Using PDF Textbooks

PDF textbooks offer unparalleled accessibility, allowing students to access course materials anytime, anywhere․ They enable efficient searching, bookmarking, and highlighting, enhancing study efficiency․ PDFs are environmentally friendly, reducing paper usage, and often cost-effective compared to physical copies․ They also provide offline access, making them ideal for remote learning․ Additionally, PDFs facilitate easy note-taking and sharing, while maintaining compatibility across various devices, ensuring a seamless learning experience․

6․2 Online Platforms for Additional Practice

Online platforms provide extensive resources for calculus and vectors practice, offering interactive exercises and problem sets․ They enable students to test their understanding and identify areas for improvement․ Many platforms feature video tutorials, step-by-step solutions, and forums for support․ These tools complement the Nelson textbook, ensuring a well-rounded learning experience with flexible access to additional practice materials anytime, anywhere․

Real-World Applications

Calculus models real-world phenomena like motion and change, while vectors analyze forces and structures in physics and engineering, demonstrating their practical relevance in solving complex problems․

7․1 Calculus in Real-World Scenarios

Calculus is indispensable in analyzing motion, optimizing systems, and modeling growth․ It is applied in physics for trajectory calculations, economics for market analysis, and biology for population studies․ Engineers use derivatives for design optimization, while medical researchers rely on integrals for drug distribution modeling․ These applications highlight calculus as a cornerstone of modern scientific and technical advancements․

7․2 Vectors in Real-World Scenarios

Vectors are essential in physics for force analysis, engineering for stress calculations, and computer graphics for animations․ They are used in navigation for direction calculations and in economics for portfolio optimization․ Vectors also model electrical fields and fluid dynamics, proving their versatility in solving complex, multidimensional problems across various disciplines․

  • Physics and engineering applications․
  • Computer graphics and animations․
  • Navigation and direction calculations․
  • Economics and portfolio optimization․
  • Electrical fields and fluid dynamics;

Common Challenges and Solutions

Students often struggle with conceptual understanding and application of calculus and vectors․ Regular practice, seeking help, and using visual aids can effectively address these challenges․

8․1 Overcoming Difficulties in Calculus

Students often face challenges with limits, derivatives, and integrals․ Breaking problems into smaller steps, using graphing calculators, and practicing regularly can enhance understanding․ Focusing on conceptual grasp rather than procedural memorization helps build a strong foundation․ Utilizing online resources and seeking guidance from instructors or peers further supports mastery of calculus concepts and applications․

8․2 Overcoming Difficulties in Vectors

Vector challenges often arise with operations and applications․ Visualizing vectors geometrically and practicing component-based calculations can improve understanding․ Breaking down problems into magnitudes and directions simplifies complex scenarios․ Utilizing online tools for vector visualization and seeking structured study guides or video tutorials aids in mastering vector concepts and their practical applications in physics and engineering effectively․

Additional Resources

Supplement your learning with recommended study guides, video solutions, and online platforms offering practice problems․ These resources provide in-depth explanations and interactive tools to enhance understanding and problem-solving skills․

9․1 Recommended Study Guides

Enhance your understanding with study guides offering detailed explanations and practice exercises․ Video tutorials and interactive tools provide step-by-step solutions, while comprehensive problem sets reinforce key concepts; These resources complement the Nelson textbook, ensuring a well-rounded learning experience for calculus and vectors․

9․2 Video Solutions and Tutorials

Video solutions and tutorials provide visual explanations for complex calculus and vector problems․ Platforms like YouTube and Khan Academy offer step-by-step guides, while specific channels and websites cater to the Nelson textbook․ Interactive tools like GeoGebra enhance understanding, allowing students to explore concepts dynamically and reinforce their learning through practical examples and real-world applications․

Practice Problems and Projects

The Nelson textbook offers extensive practice problems and projects, aligning with calculus and vector concepts․ Interactive projects and real-world applications reinforce learning, ensuring a deep understanding of the material․

10․1 Calculus Practice Problems

The Nelson textbook provides a wide range of calculus practice problems, covering limits, derivatives, and integrals․ These exercises are designed to test understanding of key concepts and their applications․ Solutions are included for self-assessment, while video tutorials and online resources offer additional support for complex topics, ensuring thorough preparation for exams and real-world challenges․

10․2 Vector Practice Problems

The Nelson textbook includes vector practice problems focusing on operations like addition, scalar multiplication, and dot products․ Exercises also cover vector applications in physics and engineering, such as force resolution and motion analysis․ Detailed solutions and video tutorials are provided to aid understanding, while online platforms offer additional practice, ensuring mastery of vector concepts and their practical uses․

Exam Preparation

Effective exam preparation involves reviewing key calculus and vector concepts, practicing past papers, and utilizing digital tools for problem-solving․ Strategic study plans and timed practice enhance readiness․

11․1 Strategies for Calculus Exams

To excel in calculus exams, focus on understanding core concepts like limits, derivatives, and integrals․ Practice a variety of problems to build problem-solving skills․ Review formulas and theorems regularly․ Use flashcards for quick revision․ Attempt past papers to improve time management․ Highlight and revisit challenging topics․ Stay calm during exams to ensure clear thinking and accurate solutions․

  • Understand the weighting of topics in the exam․
  • Allocate time wisely for each section․
  • Read questions carefully to avoid errors․
  • Use graphing calculators effectively for verification․

11․2 Strategies for Vector Exams

Mastering vector exams requires a strong grasp of vector operations and applications․ Focus on understanding dot and cross products, vector resolution, and graphical interpretations․ Practice problems involving force, displacement, and velocity․ Use diagrams to visualize vector relationships․ Review formulas for magnitude, direction, and vector addition․ Time management is key; allocate extra time for complex 3D vector problems․ Ensure accuracy in calculations and conceptual understanding to excel․

  • Practice vector decomposition and addition regularly․
  • Review applications in physics and engineering․
  • Use flashcards for key formulas and properties․

Mastering calculus and vectors requires perseverance and practice․ Utilize graphing calculators and online resources for enhanced understanding․ Stay motivated, embrace challenges, and continuously seek opportunities to deepen your knowledge and skills․

12․1 Final Tips for Success

Consistency and active learning are key to excelling in calculus and vectors․ Regularly review concepts, practice problems, and seek help when needed․ Leverage digital tools like PDF textbooks and online platforms for additional practice․ Engage with video tutorials and study guides to reinforce understanding․ Stay organized and maintain a growth mindset to overcome challenges effectively․

12․2 Encouragement for Further Learning

Embrace curiosity and explore advanced topics beyond the textbook․ Engage in real-world applications to deepen understanding․ Join study groups or online forums for shared learning․ Celebrate progress, no matter how small, and stay motivated․ Pursue additional resources and challenges to continue growing in calculus and vectors, building a strong foundation for future academic and professional success․

dot marker printables free pdf

Dot marker printables are versatile tools for education, offering engaging activities for math, counting, and color recognition. They are widely available as free PDF resources online.

What Are Dot Markers?

Dot markers are interactive educational tools designed to help students engage with various learning activities. Typically printed on paper, they consist of numbered dots arranged in patterns or sequences. Students use manipulatives, such as small objects or stickers, to mark and count the dots. These tools are widely used in early childhood education for math, counting, and fine motor skills development. Dot markers are also adaptable for color recognition, sorting, and pattern completion exercises. Many free PDF resources are available online, offering customizable templates to suit different learning needs. Their simplicity and versatility make them a popular choice for teachers and parents seeking hands-on learning experiences.

Benefits of Using Dot Markers in Education

Dot markers offer numerous benefits in educational settings, particularly for young learners. They provide a hands-on approach to learning, enhancing engagement and understanding. By using physical markers, students develop fine motor skills and hand-eye coordination. Dot markers also foster math readiness by introducing concepts like counting, basic arithmetic, and number recognition. Their visual nature aids in understanding patterns, sequencing, and color sorting. Additionally, they cater to different learning styles, making them inclusive for diverse classrooms. The availability of free PDF printables ensures accessibility for teachers and parents, allowing customization to meet specific learning objectives. Overall, dot markers are a cost-effective, versatile, and interactive tool that supports foundational skills development in an enjoyable way.

Free PDF Resources for Dot Marker Printables

Accessing free PDF resources for dot marker printables is straightforward, with numerous websites offering high-quality, downloadable materials. These resources are designed to be versatile, catering to various educational needs and age groups. Many PDFs are tailored for specific skills such as math exercises, color recognition, and pattern completion. They often include customizable templates, allowing educators to adapt activities to suit different learning levels. Popular platforms provide these printables in easily printable formats, ensuring convenience for teachers and parents. The availability of free PDFs makes them an accessible tool for enhancing learning experiences without additional costs. These resources are regularly updated, offering fresh and engaging activities to keep students motivated and involved in their educational journey.

How to Use Dot Marker Printables Effectively

Start by providing clear instructions and demonstrate activities. Use visual guides to support understanding. Encourage interactive participation and align tasks with learning objectives for maximum engagement and effectiveness.

Step-by-Step Guide to Implementing Dot Markers in the Classroom

Begin by introducing dot markers as a tactile tool for counting and pattern recognition; Distribute the printables and demonstrate how to place markers on dots accurately. Start with simple counting exercises, gradually incorporating more complex patterns and math problems. Encourage students to work in pairs or small groups to foster collaboration. Rotate activities weekly to maintain engagement and cover various skills like color sorting and sequencing. Provide immediate feedback and celebrate progress to build confidence. Finally, assess understanding through periodic reviews and adjust activities based on student needs. This structured approach ensures effective integration of dot markers into daily lessons, promoting active learning and skill mastery.

Customizing Dot Marker Activities for Different Learning Needs

Customizing dot marker activities allows educators to cater to diverse learning needs. For visual learners, use high-contrast colors and enlarge dot patterns. For kinesthetic learners, incorporate tactile exercises like placing physical markers on printed dots. Simplify patterns for younger students or those with special needs, while offering more complex sequences for advanced learners. Additionally, create bilingual versions for language learners or adapt activities for students with visual impairments by using raised dots or assistive tools. Technology can also enhance customization, with interactive PDFs allowing students to drag and drop markers digitally. By tailoring activities to individual needs, educators ensure inclusivity and maximize learning outcomes, making dot marker printables a flexible and effective educational resource.

Popular Dot Marker Printable Activities

Popular dot marker printable activities include math exercises, color recognition, and pattern completion, enhancing learning through interactive and engaging tasks.

Math and Counting Exercises

Dot marker printables are ideal for math and counting exercises, helping students develop foundational numeracy skills. Activities include counting games, basic arithmetic, and number sequencing. Students can practice matching numbers to dot arrangements, enhancing their understanding of quantity and value. These exercises are interactive, making learning engaging and fun. Many free PDF resources offer customizable templates, allowing teachers to tailor activities to different skill levels. Dot markers also support number recognition and subtraction/addition concepts through visual representation. These printables are particularly effective for early learners, providing a hands-on approach to math education. They foster problem-solving skills and confidence in handling numbers, making them a valuable tool for classrooms and homeschooling environments alike.

Color Recognition and Sorting Games

Dot marker printables are excellent for teaching color recognition and sorting skills. These activities help young learners identify and differentiate between various colors. By matching dot markers to corresponding colored circles or objects, children develop their visual recognition abilities. Sorting games enhance organizational skills and hand-eye coordination. Many free PDF resources include customizable templates with different color palettes, allowing educators to adapt activities to various learning stages. These exercises are particularly beneficial for preschool and kindergarten students, providing an engaging way to learn about colors and their properties. Dot marker printables also encourage creativity, as students can create patterns and designs using colored markers. This interactive approach makes learning colors a fun and memorable experience, fostering both cognitive and motor development in young children.

Pattern Completion and Sequencing Activities

Pattern completion and sequencing activities with dot marker printables are excellent for developing problem-solving and logical thinking skills. These exercises involve identifying and extending patterns using dot markers, helping students understand relationships between shapes, colors, or numbers. By placing markers on specific dots, children learn to recognize sequences and predict what comes next. Many free PDF resources offer pre-designed templates with varying complexity, suitable for different age groups. These activities also enhance fine motor skills and hand-eye coordination. Additionally, they foster creativity as students can create their own patterns to share or solve. Sequencing games, in particular, prepare young learners for more advanced math concepts, making them a valuable tool in early education. The interactivity of dot marker printables makes learning patterns engaging and effective.

Where to Find High-Quality Free Dot Marker PDFs

Educational websites, teacher resource platforms, and creative hubs offer free dot marker PDFs. Search for “free dot marker printables” or “dot marker templates for education” online.

Recommended Websites for Downloading Free Educational Resources

Several websites offer high-quality, free dot marker printables. Teachers Pay Teachers (TpT) and Etsy are popular platforms for educational PDFs. Pinterest is another great resource, offering a wide variety of dot marker activities. Additionally, websites like Education.com and ABCteach provide free downloadable resources for teachers and parents. Many of these sites allow users to filter by grade level or subject, making it easy to find the perfect printable for your needs. When searching, use keywords like “free dot marker printables” or “dot marker templates for education” to find relevant results. These websites are trusted sources for educational materials and often include customizable options to suit different learning environments.

How to Search for the Best Dot Marker Printables Online

To find the best dot marker printables, use specific keywords like “free dot marker printables,” “dot marker templates for education,” or “customizable dot marker activities.” Utilize search engines and educational websites to filter results by relevance and file type, ensuring you download PDFs. Check descriptions for alignment with your learning objectives and age group. Look for reviews or ratings to assess quality. Additionally, explore platforms like Teachers Pay Teachers or Pinterest, which often feature well-designed resources. Always verify the file format and customization options to ensure suitability for your classroom or homeschooling needs. By refining your search terms and focusing on trusted sources, you can efficiently locate high-quality dot marker printables that meet your educational goals.

Dot marker printables are a valuable educational tool, offering versatile and engaging activities. Their availability as free PDFs makes them accessible for enhancing learning experiences across various settings.

Final Thoughts on the Importance of Dot Marker Printables

Dot marker printables are a valuable educational tool, offering versatile and engaging activities. Their availability as free PDFs makes them accessible for enhancing learning experiences across various settings. These resources are particularly beneficial for early childhood education, as they help develop essential skills in math, counting, and color recognition. They also encourage creativity and fine motor skills through interactive exercises. Educators and parents can easily customize these printables to meet different learning needs, ensuring that children stay engaged and motivated. With their simplicity and effectiveness, dot marker printables have become a go-to resource for fostering a love for learning in young students. Their widespread availability as free PDFs ensures that quality education is accessible to everyone.

atem mini pro iso manual

The Blackmagic Design ATEM Mini Pro ISO is a compact, affordable live production switcher designed for streaming, recording, and multi-camera setups, offering advanced features for professional results.

1.1 Overview of the ATEM Mini Pro ISO

The ATEM Mini Pro ISO is a compact, affordable live production switcher designed for multi-camera streaming, recording, and broadcasting. It offers advanced features like ISO recording, live switching, and audio mixing, making it ideal for content creators, live events, and professional productions. Its intuitive design and robust capabilities ensure high-quality video and audio outputs, suitable for various applications, from small setups to larger productions, with ease of use and portability.

1.2 Key Features and Benefits

The ATEM Mini Pro ISO offers ISO recording, allowing each camera input to be recorded individually. It features four HDMI inputs with standards conversion, a Fairlight audio mixer, and USB-C output for webcam functionality. Built-in Chroma Key, transitions, and DVE enhance production quality. Its portability and intuitive interface make it ideal for live streaming, multi-camera setups, and professional-grade content creation, ensuring flexibility and efficiency in various production environments.

Technical Specifications

The ATEM Mini Pro ISO supports 4 HDMI inputs with standards conversion, up to 3840×2160 resolution, and ISO recording capabilities. It features USB-C, Ethernet, and HDMI outputs for flexible connectivity.

2.1 Supported Video Resolutions and Formats

The ATEM Mini Pro ISO supports various resolutions, including 1280×720 and 1920×1080 pixels, ensuring compatibility with a range of video formats. It handles both HD and Ultra HD standards, making it versatile for different production needs. The device also supports standards conversion, allowing seamless integration of multiple video sources with varying resolutions and frame rates. This flexibility enhances workflow efficiency and video quality.

2.2 Audio and HDMI Input/Output Capabilities

The ATEM Mini Pro ISO features a Fairlight audio mixer with EQ and dynamics for professional sound control. It supports 4 HDMI inputs with standards conversion and a USB-C output for webcam functionality. The device also offers an HDMI program output for monitoring and supports live streaming via RTMP. Audio inputs are managed seamlessly, ensuring high-quality sound integration with video sources, making it ideal for live production and streaming applications.

2.3 Connectivity Options

The ATEM Mini Pro ISO offers versatile connectivity, including 4 HDMI inputs for video sources and a USB-C port for webcam output. It also features an Ethernet port for RTMP streaming and a 3.5mm audio input. The device supports direct live streaming over Ethernet using RTMP protocol, ensuring stable and high-quality video transmission. Additionally, it has a built-in Fairlight audio mixer with EQ and dynamics for enhanced sound control and integration.

Setting Up the ATEM Mini Pro ISO

Setting up the ATEM Mini Pro ISO involves unboxing, connecting cameras, and installing the ATEM Software Control. It’s designed for quick and intuitive configuration, ensuring seamless live production workflows.

3.1 Unboxing and Hardware Connections

Unboxing the ATEM Mini Pro ISO reveals a compact, lightweight unit with HDMI inputs, USB-C, and Ethernet. Connect up to four HDMI cameras, ensuring each is powered and properly linked. The USB-C port allows recording to external drives, while Ethernet enables streaming. Connect a monitor via HDMI out for previewing sources. Ensure all cables are securely attached for stable performance during live production.

3.2 Software Installation and Firmware Updates

Install the ATEM Software Control from the Blackmagic Design website for enhanced functionality. Regular firmware updates are crucial for optimal performance and new features. Download the latest firmware from the official site and follow the update wizard. Ensure the device is connected to power during updates to prevent interruptions. Updated firmware often includes bug fixes, improved stability, and access to new features, ensuring your ATEM Mini Pro ISO operates at its best.

Key Features of the ATEM Mini Pro ISO

The ATEM Mini Pro ISO offers multi-camera control, ISO recording, Fairlight audio mixer, and RTMP streaming capabilities, making it a powerful tool for live production and content creation.

4.1 Multi-Camera Control and Switching

The ATEM Mini Pro ISO allows seamless control of up to four HDMI cameras, enabling dynamic switching between sources. Users can preview feeds, set transitions, and manage camera settings directly from the control panel or software, ensuring smooth live production workflows with minimal effort and professional results.

4.2 ISO Recording and Streaming Capabilities

The ATEM Mini Pro ISO supports ISO recording, capturing all camera feeds separately for post-production flexibility. It also features RTMP streaming for live broadcasts to platforms like YouTube or Twitch. With USB-C recording and a built-in audio mixer, it ensures high-quality video and audio output. This device is ideal for multi-camera live productions, offering simultaneous recording and streaming capabilities, making it a versatile tool for professional content creation and live events.

Advanced Features

The ATEM Mini Pro ISO offers advanced features like an audio mixer with EQ, chroma key for green screen effects, and transition effects for professional-grade live production.

5.1 Audio Mixer with EQ and Dynamics

The ATEM Mini Pro ISO features a built-in Fairlight audio mixer with EQ and dynamics processing, allowing precise control over levels, tone, and compression for professional-grade audio quality. This ensures balanced and polished sound in live broadcasts and recordings. Users can independently adjust each audio source, enabling seamless integration of microphones, music, and other inputs for a cohesive mix.

5.2 Chroma Key and Green Screen Effects

The ATEM Mini Pro ISO includes advanced chroma keying capabilities, enabling seamless green screen effects for professional-looking broadcasts. Users can easily replace backgrounds with custom images or video, ideal for creating immersive environments. The chroma key feature is highly customizable, allowing for precise adjustments to achieve smooth, realistic results. This tool is perfect for live streams, presentations, and creative productions, enhancing visual storytelling and production value.

5.3 Transition Effects and DVE

The ATEM Mini Pro ISO offers a variety of smooth transition effects and Digital Video Effects (DVE) to enhance live productions. These include dissolves, wipes, and customizable animations. The DVE allows for scaling, positioning, and rotating video sources, enabling dynamic compositions. Users can effortlessly create professional transitions between cameras and media, ensuring polished and engaging content for live streams, broadcasts, and presentations. These tools are intuitive to use and perfect for elevating production quality.

Recording with the ATEM Mini Pro ISO

The ATEM Mini Pro ISO enables direct recording of multiple video sources as ISO files, preserving each camera feed for flexible post-production editing and high-quality output.

6.1 Configuring ISO Recordings

Configuring ISO recordings on the ATEM Mini Pro ISO involves setting up individual camera feeds to record separately. Use the ATEM ISO interface to enable ISO mode, select storage devices, and format drives. Ensure each camera input is assigned correctly for isolated recording. This setup allows for independent video and audio capture, preserving high quality and flexibility for post-production editing; The device supports external USB-C drives for seamless file management and storage.

6.2 Managing Video and Audio Files

The ATEM Mini Pro ISO allows easy management of video and audio files through its intuitive interface. Recordings are saved as separate ISO files for each camera, enabling independent editing. Files are stored on external USB-C drives, ensuring ample storage capacity. The device organizes files by camera feed, with video in ProRes format and audio in WAV, maintaining high quality. Automatic file naming by date and camera number streamlines post-production workflows, while direct streaming capabilities enhance live content management.

Live Streaming Capabilities

The ATEM Mini Pro ISO supports RTMP streaming over Ethernet, enabling direct live streaming to platforms like YouTube and Facebook. It also allows USB-C recording simultaneously.

7.1 RTMP Streaming Setup

Setting up RTMP streaming on the ATEM Mini Pro ISO involves configuring the device for live streaming over Ethernet. Users can input RTMP server details, including the URL and stream key, through the ATEM Software Control or the hardware interface. The device supports real-time streaming to platforms like YouTube and Facebook, ensuring high-quality live broadcasts with minimal setup effort required.

7.2 Integrating with Popular Platforms

The ATEM Mini Pro ISO seamlessly integrates with popular streaming platforms like YouTube, Facebook, and Twitch. Users can directly connect to these platforms via RTMP, ensuring high-quality live broadcasts. The device supports pre-configured settings for these platforms, simplifying the setup process and enabling content creators to stream professionally without additional software or complicated configurations.

Troubleshooting Common Issues

Common issues include connectivity problems and audio/video sync delays. Check HDMI connections, restart devices, and ensure firmware is updated. Refer to the manual for detailed solutions.

8.1 Resolving Connectivity Problems

Connectivity issues often arise from loose HDMI connections or outdated firmware. Ensure all cables are securely plugged in and verify that the ATEM Mini Pro ISO and connected devices are running the latest firmware. Restarting the device can also resolve temporary glitches. If problems persist, consult the manual or contact Blackmagic Design support for assistance. Always use high-quality HDMI cables to minimize signal loss or interference, ensuring a stable connection for uninterrupted live switching and streaming operations.

8.2 Addressing Audio and Video Sync Issues

Audio and video sync issues can occur due to HDMI delays or firmware mismatches. Check the audio delay settings in the ATEM Software Control to ensure synchronization. Adjust the audio mixer levels and verify HDMI input settings for proper configuration. Restarting the device and ensuring all firmware is up-to-date can resolve sync problems. For persistent issues, refer to the manual or contact Blackmagic Design support for detailed troubleshooting guidance.

Maintenance and Care

Regularly clean the ATEM Mini Pro ISO with a soft cloth and avoid harsh chemicals. Use protective covers to prevent dust buildup. Update firmware periodically to ensure optimal performance and access new features.

9.1 Cleaning and Protecting the Device

Regularly clean the ATEM Mini Pro ISO with a soft, dry cloth to remove dust and dirt. Avoid harsh chemicals or abrasive materials that could damage the surface. Use a protective cover when not in use to prevent dust buildup. Store the device in a cool, dry place to maintain optimal performance. Handle with care to prevent physical damage, and ensure proper ventilation to avoid overheating during operation.

9.2 Regular Firmware Updates

Regular firmware updates are essential to ensure the ATEM Mini Pro ISO operates at peak performance. Visit the Blackmagic Design website to check for the latest updates. Download and install the firmware using the USB-C port. Always back up your settings before updating. Ensure the device is fully charged or connected to a power source during the update process to prevent interruptions. Updates often include new features, bug fixes, and performance improvements.

The Blackmagic Design ATEM Mini Pro ISO is a versatile, user-friendly device for live production, offering professional features like multi-camera control and ISO recording, ideal for content creators.

10.1 Summary of Key Takeaways

The ATEM Mini Pro ISO is a powerful tool for live production, offering multi-camera control, ISO recording, and streaming capabilities. It features an audio mixer, chroma key, and transitions, making it ideal for professional results. With its user-friendly design and advanced features, it streamlines workflows for content creators, ensuring high-quality output and versatility in various production scenarios.

cyrano de bergerac pdf

Discover the timeless tale of Cyrano de Bergerac, a poetic hero with a iconic nose, in this accessible PDF version of Edmond Rostand’s classic play. Written in verse, it explores themes of love, bravery, and sacrifice, offering a convenient way to engage with this 19th-century masterpiece.

The PDF format ensures easy reading on various devices, preserving the original charm of the play while making it accessible to modern audiences. A must-read for literature enthusiasts and fans of heroic comedies.

Overview of the Play

Cyrano de Bergerac is a heroic comedy in five acts, written by Edmond Rostand in 1897. The play tells the story of Cyrano, a brilliant poet and swordsman with a large nose, who helps his cousin Christian win the heart of Roxane. Rich in verse and wit, it explores themes of love, bravery, and sacrifice. The PDF version offers a convenient way to read this classic, preserving its poetic beauty and emotional depth. It remains a celebrated work of French literature, admired for its timeless themes and vivid characters.

Importance of the PDF Version

The PDF version of Cyrano de Bergerac is invaluable for its accessibility and preservation of Edmond Rostand’s original verse. It allows readers to engage with the play’s poetic beauty and emotional depth on various devices, making it ideal for both academic and casual reading. The format ensures that the play’s historical and literary significance is maintained, offering a reliable resource for studying or enjoying this timeless masterpiece of French literature. Its convenience and fidelity to the original make it a preferred choice for modern audiences.

Historical Background of Cyrano de Bergerac

Cyrano de Bergerac, a play by Edmond Rostand, premiered in Paris in 1897, revitalizing the legend of the 17th-century writer and inventor, ensuring its lasting literary impact.

The Real Cyrano de Bergerac

The real Cyrano de Bergerac was a 17th-century French novelist, playwright, and inventor, known for his bold ideas and literary works. He inspired Edmond Rostand’s iconic play, which romanticizes his life, focusing on his courage and wit. Cyrano’s writings often explored futuristic themes, showcasing his innovative mind. His actual life, though less dramatic than the play, left a lasting legacy in French literature, blending reality and fiction in a timeless narrative.

Today, his story endures through various adaptations, including the widely available PDF versions of Rostand’s play, making his legacy accessible to global audiences.

Edmond Rostand and His Inspiration

Edmond Rostand, a French playwright, drew inspiration from the life of the real Cyrano de Bergerac to craft his iconic play; At just 28, Rostand achieved literary acclaim with this work, blending historical facts with creative genius. The play’s success was instantaneous, captivating audiences with its unique blend of wit, romance, and heroism. Rostand’s portrayal of Cyrano as a poetic swordsman with a large nose became iconic, cementing the character’s place in literary history; His work remains a testament to the power of artistic inspiration and historical adaptation.

The PDF versions of the play allow readers to explore Rostand’s masterpiece in a convenient format, preserving the original verse and charm for modern readers.

Main Characters in Cyrano de Bergerac

The play revolves around Cyrano de Bergerac, a poetic swordsman with a large nose, and his unrequited love for Roxane. Other key characters include Christian de Neuvillette, a young nobleman, and Comte de Guiche, who adds depth to the story. These characters drive the narrative, exploring themes of love, bravery, and sacrifice.

Cyrano de Bergerac: The Protagonist

Cyrano de Bergerac is the charismatic and complex hero of the play, known for his extraordinary bravery, wit, and poetic talent. His large nose, a defining feature, symbolizes his uniqueness and pride. Cyrano is a skilled swordsman and a romantic at heart, deeply in love with Roxane, though he believes his appearance makes him unworthy of her affection. His selflessness shines as he aids Christian in winning Roxane’s heart, showcasing his noble character and inner strength. Cyrano’s journey represents a blend of humor, tragedy, and poetic grandeur.

Christian de Neuvillette and Roxane

Christian de Neuvillette is a young nobleman who becomes entangled in a romantic triangle with Roxane and Cyrano. Christian’s charming appearance contrasts with his lack of eloquence, leading him to rely on Cyrano’s poetic skills to express his feelings. Roxane, a beautiful and intellectual woman, is the object of both men’s affections. Her admiration for Christian’s words, unknowingly penned by Cyrano, complicates the relationship, highlighting themes of love, identity, and unspoken emotions. Their story unfolds as a poignant exploration of heartache and devotion.

Plot Summary of the Play

Cyrano de Bergerac unfolds in 17th-century France, tracing Cyrano’s unrequited love for Roxane and his aid to Christian in wooing her, amidst rivalry and sacrifice, blending humor and tragedy.

Act I introduces the vibrant world of 17th-century Paris, where the charismatic Cyrano de Bergerac, known for his large nose and poetic wit, first appears. The act sets the stage for the central characters, including Christian de Neuvillette, a handsome but inarticulate nobleman, and Roxane, the beautiful cousin Cyrano secretly adores. The scene unfolds in a bustling theater, where Cyrano’s bravery shines as he defies the arrogant Valvert and rescues Christian from a duel. This act establishes Cyrano’s magnetic personality, his unspoken love for Roxane, and the beginnings of his complex relationship with Christian, setting the foundation for the tragicomedy ahead.

Act II: The Love Triangle Unfolds

Act II deepens the emotional entanglement as Cyrano, Christian, and Roxane navigate their complex feelings. Cyrano, hiding his love for Roxane, agrees to help Christian woo her by writing poetic letters. Roxane, enchanted by Christian’s seemingly eloquent words, begins to fall for him, unaware of Cyrano’s role. Meanwhile, the Comte de Guiche schemes to disrupt their relationship, adding tension to the unfolding drama. This act highlights Cyrano’s selfless devotion and the tragic irony of his unspoken love, setting the stage for heartbreak and sacrifice.

Themes and Symbolism in Cyrano de Bergerac

The play explores themes of love, bravery, and sacrifice, with Cyrano’s nose symbolizing his uniqueness and inner beauty. His unspoken love for Roxane highlights the tragedy of unrequited passion.

Love, Bravery, and Sacrifice

Cyrano de Bergerac embodies the profound themes of love, bravery, and sacrifice. His unrequited love for Roxane underscores the depth of selfless devotion, while his unwavering courage in battle highlights his heroic spirit. Cyrano’s willingness to sacrifice his own happiness for the sake of others, particularly Christian and Roxane, exemplifies the pinnacle of noble sacrifice. These themes weave together to create a timeless narrative of honor, passion, and the human condition, resonating deeply with readers and audiences alike in the PDF version of the play.

The Symbolism of Cyrano’s Nose

Cyrano’s iconic nose is a powerful symbol, representing both his pride and his self-perceived imperfection. It embodies his unique identity and serves as a focal point for his insecurities. The nose also symbolizes his bold individuality, as he refuses to conform to societal standards of beauty. Through his nose, Cyrano’s character challenges notions of appearance versus inner worth, making it a central element in the play’s exploration of identity and self-acceptance. This symbolic feature enriches the narrative, adding depth to Cyrano’s complex and enduring character in the PDF version of the play.

PDF Versions and Translations

Cyrano de Bergerac is widely available in PDF format, including translations by Gladys Thomas and Mary F. Guillemard, ensuring accessibility for modern readers worldwide.

English Translations by Gladys Thomas and Mary F. Guillemard

Gladys Thomas and Mary F. Guillemard’s English translations of Cyrano de Bergerac are celebrated for their faithfulness to Edmond Rostand’s original verse. Their work captures the poetic essence and emotional depth of the play, making it accessible to English-speaking audiences. Available in PDF format, these translations have become a cornerstone for understanding the complexities of Cyrano’s character and the timeless themes of the play.

Other Notable Translations and Editions

Beyond Gladys Thomas and Mary F. Guillemard’s work, Cyrano de Bergerac has seen other remarkable translations and editions. Brian Hooker’s verse adaptation offers a fresh perspective, while Roy Glashan’s Library provides a digitized version. The University of Chicago Library and RGL e-Book editions ensure accessibility. These translations preserve the play’s poetic essence, catering to diverse reader preferences. Whether in verse or modern language, these editions keep Cyrano’s story alive for contemporary audiences, making the classic play easily accessible in PDF formats for digital readers.

Stage Adaptations and Performances

Cyrano de Bergerac has been brought to life in numerous stage productions, including the iconic 1990 film adaptation directed by Jean-Paul Rappeneau. The original 1897 performance at Théâtre de la Porte Saint-Martin marked its theatrical debut, while modern revivals continue to captivate audiences with its enduring legacy.

Famous Stage Productions

The original 1897 premiere of Cyrano de Bergerac at Paris’s Théâtre de la Porte Saint-Martin was a landmark event, catapulting Edmond Rostand to fame. The play has since been adapted into numerous stage productions, including a celebrated 1990 film directed by Jean-Paul Rappeneau. Notable performances include those by Walter Hampden in the 1920s, which brought the play to international acclaim. Its timeless appeal continues to inspire actors and audiences alike, making it a grand spectacle of love, bravery, and poetic wit.

Modern Interpretations and Revivals

Modern productions of Cyrano de Bergerac have breathed new life into the classic tale, blending traditional elements with contemporary staging and diverse casting. Recent revivals, such as the 2008 production at the Châtelet Theatre in Paris, have showcased innovative choreography and multimedia effects. These adaptations highlight the enduring relevance of Cyrano’s story, proving that his themes of love and self-sacrifice transcend time. The play’s universal appeal continues to captivate audiences, ensuring its place as a timeless masterpiece of world literature and theatre.

blind wine tasting sheet pdf

Blind wine tasting involves sampling wines without knowing their labels‚ allowing tasters to focus on sensory evaluation and unbiased judgment. This method enhances understanding of wine characteristics‚ fostering a deeper appreciation for aroma‚ flavor‚ and texture. It’s a popular educational tool for wine enthusiasts and professionals‚ often complemented by scorecards and grids for detailed analysis.

Understanding the Concept of Blind Wine Tasting

Blind wine tasting is a structured method where wines are served in opaque containers or wrapped to conceal their labels. This technique eliminates bias‚ allowing tasters to focus solely on sensory characteristics like color‚ aroma‚ and palate. Using tools like a blind wine tasting sheet PDF‚ participants can systematically evaluate wines‚ identifying grape varieties‚ regions‚ and vintages based on objective observations‚ enhancing their palate and appreciation for wine diversity.

Importance of Blind Wine Tasting in Wine Education

Blind wine tasting is a cornerstone of wine education‚ as it removes biases tied to labels‚ enabling students to develop unbiased opinions. By focusing on sensory evaluation‚ it sharpens skills in identifying grape varieties‚ regions‚ and vintages. Tools like a blind wine tasting sheet PDF provide structure‚ helping learners systematically analyze wines and build confidence in their palate‚ accelerating their journey in mastering wine identification and appreciation.

History of Blind Wine Tasting

Blind wine tasting gained prominence with the 1976 Judgment of Paris‚ where French and American wines were compared anonymously‚ revolutionizing wine perception. This method has since become a cornerstone in wine education and professional training‚ often supported by tools like a blind wine tasting sheet PDF for systematic analysis.

The Legendary 1976 Judgment of Paris

In 1976‚ a groundbreaking blind tasting event pitted French wines against unknown American blends‚ shocking the wine world. Organized by Steven Spurrier‚ nine French judges unknowingly awarded top scores to American wines‚ challenging France’s dominance. This historic event‚ covered by journalist George Taber‚ marked a turning point in wine history‚ proving that blind tasting could reveal unexpected excellence‚ and forever altering global wine perceptions.

Evolution of Blind Tasting in Modern Wine Culture

Blind tasting has evolved into a cornerstone of modern wine culture‚ democratizing wine appreciation by eliminating bias. Today‚ enthusiasts and professionals alike use scorecards and grids to systematically evaluate wines‚ fostering deeper sensory analysis. This method not only enhances learning but also encourages exploration‚ making wine accessible to a broader audience while preserving its educational and enjoyable essence.

How to Prepare for a Blind Wine Tasting

Preparing for a blind wine tasting involves setting up a neutral environment‚ using score sheets‚ and ensuring wines are wrapped or bagged to conceal labels. This setup helps focus on sensory evaluation without bias.

Setting Up the Tasting Environment

Creating a neutral environment is crucial for blind wine tasting. Wrap bottles in paper or use numbered bags to conceal labels. Ensure neutral lighting for color evaluation and a quiet‚ odor-free space to avoid bias. Arrange glasses‚ water for palate cleansing‚ and scorecards for systematic evaluation. This setup fosters focus on sensory details without distractions or preconceptions.

Using Wine Tasting Score Sheets and Grids

Wine tasting score sheets and grids are essential tools for blind tasting‚ providing a structured way to evaluate wines. They typically include sections for appearance‚ aroma‚ and flavor‚ helping tasters identify key characteristics objectively. Printable PDFs are widely available‚ offering templates for systematic note-taking. These tools enhance consistency‚ clarity‚ and memory recall‚ making them invaluable for both professionals and enthusiasts during blind wine tastings.

The Tasting Process

The tasting process involves visual examination‚ aroma assessment‚ and flavor evaluation. These steps help identify a wine’s origin and characteristics without bias‚ enhancing sensory awareness and precision.

Visual Examination of the Wine

Visual examination involves observing the wine’s color‚ clarity‚ and viscosity. Tilt the glass to assess depth and hue‚ indicating age and grape variety. Look for sediment or haziness‚ which may suggest unfiltered or aged wines. This step provides initial clues about the wine’s origin and condition‚ aiding in identification during blind tasting sessions.

Olfactory and Gustatory Analysis

Olfactory and gustatory analysis involves smelling and tasting the wine to identify its aromas and flavors. Swirl the wine to release volatile compounds‚ then inhale deeply to detect notes like citrus or spice. When tasting‚ note the texture‚ acidity‚ and finish. This step helps tasters deduce grape variety‚ region‚ and vintage‚ enhancing their ability to identify wines blindly.

Improving Your Palate for Blind Tasting

Improving your palate involves systematic tasting and using tools like grids and scorecards. Regular practice helps refine your ability to identify specific wine characteristics accurately.

Practical Techniques for Recognizing Wine Characteristics

Practical techniques include systematic evaluation of color‚ aroma‚ and flavor. Use scorecards to note viscosity‚ acidity‚ and tannins. Practice comparing wines side by side to sharpen sensory skills. Record observations to build memory and consistency‚ enhancing your ability to identify varieties and regions accurately during blind tastings.

The Role of Memory and Experience in Wine Identification

Memory and experience are crucial for identifying wines blindly. Over time‚ tasting various wines builds a mental library of flavors‚ aromas‚ and textures. This accumulated knowledge helps recognize patterns and characteristics‚ enabling more accurate identifications. Experience also refines your ability to distinguish subtle differences‚ enhancing consistency in blind tasting evaluations.

Hosting a Blind Wine Tasting Party

Hosting a blind wine tasting party involves wrapping bottles to conceal labels and using scorecards for structured feedback. It fosters engaging discussions and educational fun for guests.

Organizing a Fun and Educational Event

Organizing a blind wine tasting event involves wrapping bottles in numbered bags‚ preparing scorecards‚ and guiding guests through the tasting process. This setup encourages interactive learning‚ fostering camaraderie and wine knowledge among participants. Printable templates and structured formats help streamline the experience‚ making it both enjoyable and enlightening for everyone involved in the activity.

Using Printable Wine Scorecards for Group Participation

Printable wine scorecards are essential for blind tasting events‚ offering structured spaces to record observations on appearance‚ aroma‚ and palate. These tools foster engagement and consistency‚ allowing participants to compare notes and gain insights. Customizable templates with grids and checkboxes simplify the evaluation process‚ ensuring a seamless and educational experience for all attendees involved in the tasting activity.

Wine Scoring Systems and Terminology

Standardized scoring systems‚ like the 100-point scale‚ and specific terminology help evaluate wines consistently. Terms describe appearance‚ aroma‚ and palate‚ aiding precise communication and unbiased assessment.

Standardized Scoring Methods for Consistency

Standardized scoring methods ensure consistency in blind wine tasting by using tools like the 100-point scale or tasting grids; These systems break down wines into appearance‚ aroma‚ and palate‚ allowing tasters to evaluate objectively. Such methods reduce bias and enhance precision‚ making them invaluable for professionals and enthusiasts alike in comparative tastings and wine education.

Common Terms Used in Wine Tasting Notes

Common terms in wine tasting notes include descriptors like acidity‚ tannins‚ body‚ and finish. Terms such as “crisp” or “smooth” describe texture‚ while “fruity” or “earthy” denote aroma and flavor. These standardized terms help tasters communicate effectively‚ ensuring clarity and consistency when documenting their sensory experiences during blind tastings.

Blind Tasting and Food Pairing

Blind tasting enhances food pairing by removing label bias‚ allowing tasters to focus on complementary flavors and textures. This method ensures a genuine match‚ making dining experiences educational and enjoyable while exploring hidden pairings.

Matching Wines to Foods Without Knowing the Label

Blind tasting allows you to match wines with foods without label influence‚ focusing on flavor profiles and textures. Using a blind wine tasting sheet PDF‚ you can record notes on color‚ aroma‚ and taste‚ ensuring unbiased pairings. This method enhances dining experiences by revealing unexpected combinations‚ making meals more educational and enjoyable.

Enhancing the Dining Experience Through Blind Pairing

Blind pairing revolutionizes dining by eliminating preconceptions‚ making meals unpredictable and exciting. It sharpens sensory skills‚ encouraging tasters to focus on flavor and texture. Printable blind tasting sheets guide structured tasting‚ facilitating discovery and fun. This approach fosters a deeper appreciation for wine and food‚ turning meals into engaging experiences that delight and educate.

Resources for Further Learning

Explore free printable wine tasting scorecards and guides online‚ perfect for enhancing your learning journey. Utilize educational tools like tasting grids to refine your skills and organize your tasting sessions effectively.

Recommended Reading and Online Tools

Enhance your blind wine tasting journey with downloadable PDF guides‚ including tasting grids and scorecards. Explore online platforms offering free resources‚ such as WSET study aids and printable materials. These tools provide structured frameworks for analyzing wines‚ helping you refine your palate and track your progress effectively. Utilize these resources to deepen your understanding and improve your tasting skills systematically.

Advanced Techniques for Professional-Level Tasting

Professional-level blind tasting employs advanced tools like detailed tasting grids to systematically evaluate wines. This method enhances sensory perception by focusing on precise descriptors for appearance‚ aroma‚ and flavor. By refining these skills‚ tasters can identify subtle nuances‚ track progress‚ and achieve greater accuracy in wine identification‚ making it an indispensable practice for serious enthusiasts and sommeliers alike.

Blind wine tasting is a transformative skill that enhances appreciation and understanding of wine. By mastering this technique‚ enthusiasts can uncover new flavors and broaden their palate‚ fostering a lifelong journey of discovery and enjoyment in the world of wine.

Summarizing the Key Benefits of Blind Wine Tasting

Blind wine tasting removes biases‚ allowing unbiased evaluation of wines based on their intrinsic qualities. It sharpens sensory skills‚ enhances flavor recognition‚ and builds confidence in identifying wine characteristics. Using tools like scorecards and grids helps structure tasting experiences‚ making learning and enjoyment more effective for both novices and professionals.

Encouraging Continuous Exploration and Learning

Blind wine tasting fosters a culture of curiosity and growth‚ encouraging tasters to explore new wines without preconceptions. By using tools like printable scorecards and grids‚ enthusiasts can track progress‚ refine their palates‚ and deepen their understanding of wine. This practice not only enhances skills but also nurtures a lifelong passion for discovery and learning in the world of wine.